
The first time I encountered VCT tile, I was 22 years old, standing in the dingy basement of a rental house my buddy and I were supposed to “fix up” in exchange for reduced rent. The floor was ugly — beige 12×12 squares with brown specks — and I assumed it was cheap linoleum someone had slapped down in the 70s. I was half right. It was cheap. But it also turned out to be one of the most practical flooring materials I’ve ever worked with.
VCT stands for Vinyl Composition Tile. Not a sexy name. Nobody’s pinning VCT inspiration photos on Pinterest. But if you need a floor that costs almost nothing, survives abuse, and doesn’t require a professional installer, this might be exactly what you’re looking for.
The Dirt-Simple Explanation
VCT is made by mixing PVC (the same type of plastic in plumbing pipes), ground limestone, plasticizers, and color pigments under high heat and pressure. The mixture gets rolled into big sheets, then cut into tiles — almost always 12 inches by 12 inches, in thicknesses of either 1/16 inch or 1/8 inch. You’ll spot the 1/8-inch stuff at Home Depot and Lowe’s for about $1 to $2 per tile. Armstrong is the big name in VCT, but you’ll also see brands like Tarkett and Mannington.
Here’s the thing that makes VCT different from most other flooring: the color goes all the way through. If you scratch it, the material underneath is the same color as the top. That’s not true of laminate (where the wood pattern is a thin printed layer) or LVT (where the photo layer sits under a clear wear layer). A VCT scratch just reveals… more VCT. It’s the flooring equivalent of a potato — what you see on the outside is what you get all the way through.
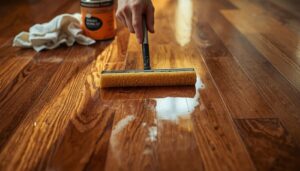
That said, VCT is porous. If you install it without sealing it, it’ll absorb stains like a sponge. Spill coffee on unsealed VCT and you’ve got a permanent brown spot. This is the one thing people get wrong about VCT — they think it’s “vinyl” so it must be waterproof and stain-proof. It is water-resistant, not waterproof. And it absolutely needs a coat of acrylic sealer after installation, reapplied every year or two depending on how much traffic the floor gets.
What It Actually Costs
Let me give you real numbers from my last VCT project — a 180-square-foot laundry room in my current house.
The tiles themselves: I bought Armstrong Standard Excelon VCT in a charcoal color at $1.19 per tile. At 180 square feet, that’s 180 tiles (VCT is one tile per square foot) for about $215. Could have gone cheaper with the off-brand stuff at a flooring supply store, maybe 79 cents a tile, but I wanted the Armstrong because their color consistency between boxes is better.
The adhesive: a gallon of Henry 430 ClearPro VCT adhesive was about $25. One gallon covers roughly 150 to 200 square feet with a 1/16-inch V-notch trowel. You’ll also need the trowel itself — $8 at Home Depot.
The sealer: Zep or Armstrong acrylic floor sealer runs about $30 a gallon. One gallon covers about 300 to 400 square feet for a single coat. Plan on two coats minimum.
Total materials for that laundry room: roughly $300. That’s $1.67 per square foot for everything. For comparison, the cheapest ceramic tile I could find would have been about $600 in materials alone — not counting the thinset, grout, backer board, and the wet saw rental I would have needed. And ceramic tile in a laundry room is miserable to stand on for more than ten minutes.
Installing VCT Without Losing Your Mind
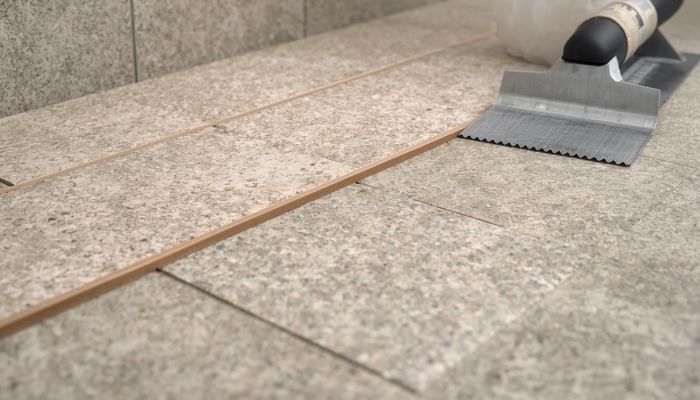
VCT is glued down — there’s no click-lock floating option here. If that scares you, I get it. Glue is permanent. But the process is actually simpler than it sounds, and there’s no sawing involved. You score VCT with a utility knife and snap it, just like LVT.
The critical part isn’t laying the tiles — that’s straightforward. The critical part is subfloor preparation. VCT shows every imperfection underneath it. If your concrete slab has a crack, that crack will telegraph through the tile within months. If there’s a high spot, you’ll feel it through your shoes every time you walk over it.
Here’s my prep process now, after learning the hard way:
- Sweep and vacuum the slab until it’s obsessively clean. Then vacuum it again. Any grit under the tile becomes a bump.
- Fill cracks and low spots with a cementitious patching compound. Henry 547 or similar — it’s about $15 a gallon. Let it cure overnight.
- Test for moisture: tape a 2-foot square of plastic sheeting to the slab and wait 24 hours. If condensation forms, you’ve got a moisture problem that needs to be addressed — VCT adhesive doesn’t bond well to perpetually damp concrete.
- Spread the adhesive with a notched trowel in sections. Don’t cover the whole floor at once — the adhesive skins over in about 30 to 45 minutes depending on humidity, and once it skins, tiles won’t stick properly. Work in 4-foot-by-4-foot sections.
- Press each tile down firmly and roll the floor with a floor roller (rent one — $15 at Home Depot for four hours) to ensure full adhesive contact.
- Wait 24 hours before applying sealer. Then two coats, letting each dry completely.
The first time I did VCT I skipped the floor roller. Figured I could just walk on the tiles and that’d be good enough. About a month later, tiles started shifting at the edges. Don’t skip the roller.
Where VCT Makes Sense
Basements are the classic use case. VCT handles the occasional dampness of a basement better than laminate or engineered wood, costs less than LVT, and if a tile gets damaged, you can pop it out with a heat gun and replace it individually. Try doing that with sheet vinyl.
Laundry rooms and utility rooms are another perfect fit. Nobody’s trying to impress guests with the laundry room floor. You just want something that cleans easily, doesn’t care about detergent spills, and doesn’t cost real money.
Home gyms are an underrated VCT application. The tiles are firm enough to support heavy equipment but have just enough give that they’re more comfortable than concrete. And if you drop a dumbbell, it’ll dent the tile but won’t shatter it — and a dent in VCT is usually less visible than a crack in ceramic. I put VCT in my garage gym three years ago and it still looks fine, which is honestly more than I expected.
Places I wouldn’t recommend VCT: anywhere with standing water (bathroom floors get too wet at the seams), high-end living spaces where you want a premium look, or anywhere you’re unwilling to reseal every year or two. VCT without sealer will stain, and sealing is a chore — move all the furniture, clean the floor, apply sealer, wait, apply again, wait, move everything back. It’s not hard work but it’s annoying. If you’re the kind of person who puts off oil changes, VCT might not be for you.
Here’s my honest bottom line on VCT: it’s not the prettiest flooring in the world. It never will be. But at less than $2 per square foot all-in, it’s one of the best value propositions in home improvement. I’ve used it in three houses now — two basements and that laundry room — and I’ve never regretted it. For the right room, with the right expectations, it’s hard to beat.
Thanks for this breakdown. Bookmarked for my upcoming project — exactly what I needed.
This answered questions I didn’t even know I had. Great practical advice here.