
I have 1,200 square feet of hardwood in my house. About 800 of it is engineered. The other 400 is solid red oak. I installed the engineered myself. I paid someone to do the solid. I have strong opinions about both.
The conversation about engineered versus solid hardwood usually goes like this: “Solid is real wood. Engineered is fake.” This is wrong. Engineered hardwood is real wood — the top layer you walk on, the one that gets scratched by dog nails and dented by dropped cast-iron pans, is genuine oak or maple or hickory. The difference is what’s underneath. And what’s underneath matters more than most people realize.
How I Ended Up With Both
My current house is a 1960s ranch. The original living room, dining room, and hallway had three-quarter-inch solid red oak installed when the house was built — site-finished, stained a hideous orange honey color, but structurally perfect. I had those rooms professionally sanded and refinished in a natural matte finish. Cost: $3.50 per square foot for sanding, staining, and three coats of Bona Traffic HD water-based finish. Those floors are 60 years old and will probably outlast me.
The bedrooms, however, had carpet over concrete slab. The basement was concrete. The kitchen had three layers of vinyl tile. Solid hardwood was not an option in any of these spaces — you can’t nail solid hardwood to concrete, and even if you glue it down, the moisture from the slab will eventually make it cup. Engineered was the only real-wood option that would work.
I spent about six months researching brands, wear layer thicknesses, and installation methods. I visited four flooring stores, gathered 22 samples, and annoyed my wife to the point where she said “just pick something or I’m keeping the carpet.” Here’s what I learned.
The Wear Layer Is the Only Number That Matters
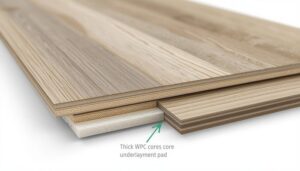
Engineered hardwood from different manufacturers varies wildly in quality, and the spec that tells you everything is the wear layer thickness — the actual slab of real wood on top.
I’ve seen engineered flooring with a 0.6mm wear layer. That is essentially veneer. It cannot be sanded. It cannot be refinished. If something scratches through that 0.6mm, you’re looking at the plywood core and there’s nothing you can do except replace the plank. A lot of the “deal” engineered flooring at big box stores — the $2.99 per square foot stuff — has wear layers this thin. I consider it disposable flooring dressed up as hardwood.
My engineered floors have a 4mm wear layer. That’s thick enough to be sanded and refinished at least once, maybe twice. I bought Mohawk engineered white oak in a 6-inch-wide plank with a 4mm sawn-face wear layer and a plywood core. It cost me $5.49 per square foot at a local flooring supply house. Mohawk and Shaw are both solid mid-range brands — not the cheapest, not the most expensive. Bruce is another one you’ll see everywhere (they’re owned by the same parent company as Armstrong now). I avoided Bruce because a contractor friend told me their quality control has been inconsistent since the manufacturing moved around.
For the basement, I went even more practical. I used a floating engineered floor from a brand called Home Legend (Home Depot’s house brand, honestly) with a 2mm wear layer. It was $3.19 per square foot. The basement is a playroom and home gym. When my kids destroy it, I’m not going to refinish it — I’ll replace it. The 2mm wear layer is fine for a space where you’re not chasing perfection.
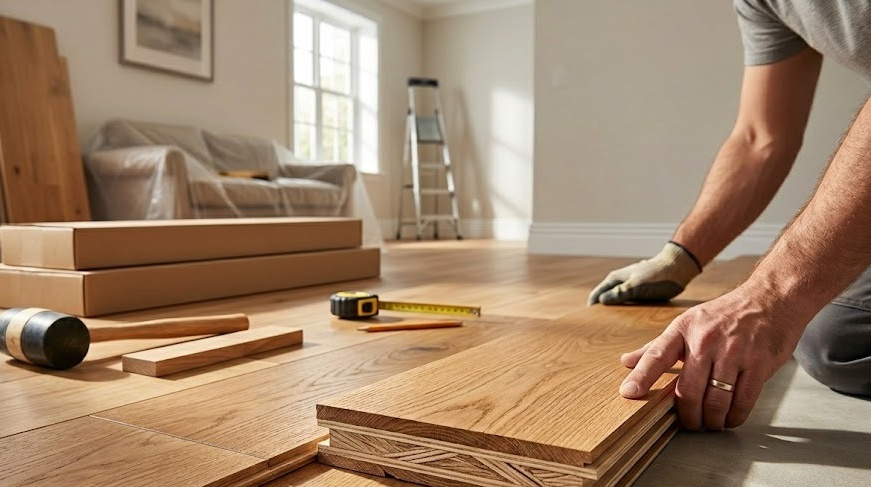
Installation Day: What I Actually Did
The bedrooms were a floating click-lock installation over a foam underlayment. Here’s exactly what I bought: 800 square feet of Mohawk engineered white oak (I ordered 880 to account for waste — and I used every single box), 800 square feet of FloorMuffler underlayment ($0.49 per square foot, it’s a dense blue foam with a moisture barrier built in), a Roberts 10-58 tapping block, a Roberts 10-28 pull bar, a dead blow hammer I already had, and a Home Depot brand jigsaw with Bosch T101BR reverse-cut blades (the reverse blade prevents chipping the top surface).
I had never installed flooring before. I watched a YouTube video from a guy named Jeff at Home RenoVision DIY the night before, and honestly that single 22-minute video was better preparation than everything else I’d read. He showed the staggering pattern, how to tap the planks without damaging the edge, how to handle door jambs with an oscillating multi-tool — all things I would have gotten wrong.
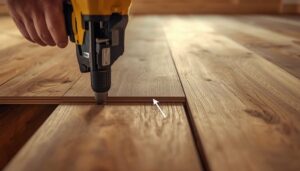
Day one I installed 350 square feet across two bedrooms in about nine hours. My knees were destroyed, even with the $23 Husky knee pads from Home Depot. Day two I did 450 square feet in the third bedroom and hallway in another eight hours. The click-lock system on the Mohawk planks worked as advertised — maybe 2% of the joints needed persuasion with the tapping block, and the rest clicked together with hand pressure.
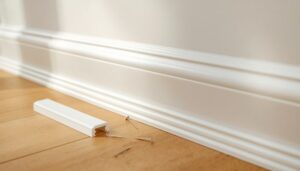
Things I got wrong: I didn’t leave enough expansion gap (three-eighth inch) in one corner of the master bedroom, and by summer the floor was buckling slightly against the baseboard. I had to pull off the shoe molding and undercut the drywall with an oscillating tool to free up space. The floor settled flat within a day. I also staggered my end joints poorly in the first row — four planks in a row all ended within three inches of each other, which created a visible “zipper” pattern that I can’t unsee but nobody else notices.
Engineered vs Solid: The Real Differences Nobody Talks About
Solid hardwood feels heavier underfoot. There’s a density to it, a solidity when you walk across it. My solid oak floors in the living room have that satisfying, permanent thud when you step on them. The engineered floors in the bedrooms have a slightly hollower sound — not like laminate hollow, but not the same deep resonance. If you’re the kind of person who notices these things, you’ll notice it.
Solid hardwood expands and contracts. A lot. My solid oak floors have a visible gap of about one-eighth inch between planks in February when the humidity is 25%, and they’re tight as a drum in August when it’s 60%. This is normal. Engineered floors barely move. After two years, my engineered planks haven’t shown a single seasonal gap. The cross-ply core does exactly what it’s supposed to do.
Repair potential is the big difference. If someone drags a refrigerator across my solid oak floor and gouges a 4-foot scratch, I can sand the whole room down to bare wood and start over. I can do that five or six more times over the life of the floor. If someone gouges my engineered floor, I can sand it exactly once. Maybe twice. Then the wear layer is gone and the floor is trash. For me, with young kids and a 70-pound dog, that math is a little uncomfortable. But solid wasn’t an option in those rooms anyway, so it’s a moot point.
Cost is the other real difference. My solid oak floors, if I were buying them new today, would cost $8 to $10 per square foot for materials plus $3 to $5 per square foot for professional nail-down installation. My engineered floors were $5.49 per square foot and I installed them myself. That’s roughly $14,000 for solid versus $6,600 for engineered on 1,200 square feet — and the engineered includes free labor (mine).
Where I’d Use Each If I Did It Again
Main floor, above grade, wood subfloor, long-term house: solid hardwood, professionally installed. The refinish potential is worth the extra cost if you’re going to be in the house for 15-plus years. My parents’ house has the same solid oak floors installed in 1987, sanded twice, and they still look beautiful.
Bedrooms above grade on wood subfloor, tight budget: engineered with a 4mm-plus wear layer. You get 90% of the real-wood experience at 60% of the cost.
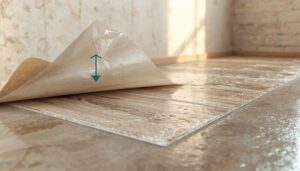
Basement, concrete slab, or high-humidity climate: engineered is your only real-wood option. Use a vapor barrier underlayment, acclimate the planks in the room for 72 hours before install (I stacked my boxes with spacers between them for airflow), and keep the humidity between 35% and 55% year-round. I run a dehumidifier in my basement from May through October.
Bathroom or laundry room: don’t use any hardwood. Engineered is water-resistant, not waterproof. I used luxury vinyl plank in my bathroom — the kind from Flooret with a 40-mil wear layer — and I don’t regret it for a second. Spilled bathwater sits on top and pools while my kids splash around, and I don’t panic.
My neighbor across the street put solid Brazilian cherry in his entire first floor including the kitchen five years ago. It cost him $18,000. Last year his dishwasher supply line leaked while he was at work, and by the time he got home the floor had cupped across 200 square feet. Insurance covered part of it, but he still had to rip out and replace a third of the floor. Engineered might have survived that leak, or at least limited the damage. Solid didn’t stand a chance.
I don’t think one is better than the other. They’re different tools for different situations. The mistake people make is choosing based on what they think is “real” flooring rather than what actually works in their house. I made that mistake once — I briefly considered trying to glue solid hardwood over my basement concrete because I thought engineered was a compromise. My flooring guy talked me out of it in about 30 seconds. “You want to see what glued-down solid over concrete looks like after two years? I have photos.”
I went with engineered. Two years later, no photos necessary.
Does this work well in humid climates? I’m in the South and moisture is always a concern.
Would you recommend this for a DIYer with moderate experience, or better to hire a pro?