
I put a 6-mil polyethylene vapor barrier on the wrong side of my basement wall. It took three years before I noticed anything was wrong. By then, the bottom plate of the stud wall had rotted through, black mold was growing behind the drywall, and I had to gut an entire 400-square-foot finished room down to the concrete.
This was my first house — a 1940s Cape Cod in Massachusetts. I had just finished framing the basement walls, ran electrical, threw up some R-13 kraft-faced fiberglass batts, and then, because I read somewhere that you need a vapor barrier on the warm side, I stapled 6-mil clear plastic over the whole thing before hanging drywall.
That “warm side” rule I followed? It’s correct for above-grade walls in a cold climate. Warm, moist indoor air wants to push outward through the wall in winter. The vapor barrier stops it before it hits the cold exterior sheathing and condenses. Makes sense.
But a basement wall is not an above-grade wall. In summer, the soil outside the foundation is cool and damp — usually around 50 to 55 degrees. The basement interior is warmer, maybe 65 to 70 degrees, and you’re running a dehumidifier. The vapor drive is reversed. Moisture wants to move from the damp soil, through the porous concrete foundation, and into your basement. My 6-mil poly sheet was sitting on the interior face of the stud wall — the “warm side” in winter, but the wrong damn side in summer. The moisture came through the concrete, traveled through the fiberglass, hit the plastic, and had nowhere to go. It condensed on the back of the poly, dripped down into the bottom plate, and sat there.
Three summers. Three New England summers of humidity soaking into a 2×4 sitting on concrete. When I finally noticed the musty smell and cut a small inspection hole in the drywall, the sill plate crumbled when I poked it with a screwdriver. Black staining ran up the studs about eighteen inches. I pulled off a full sheet of drywall and found the back side of the poly covered in beads of water like a greenhouse wall.
The fix cost me $4,200. I hired a remediation crew to remove all the drywall and insulation, treat the studs that were salvageable (about half of them), and cut out and replace the rotted bottom plates. Then I had to figure out the right way to insulate and seal it.
What a Vapor Barrier Actually Does
Let me back up, because before you can understand the wall-side debate, you need to understand what these products actually do.
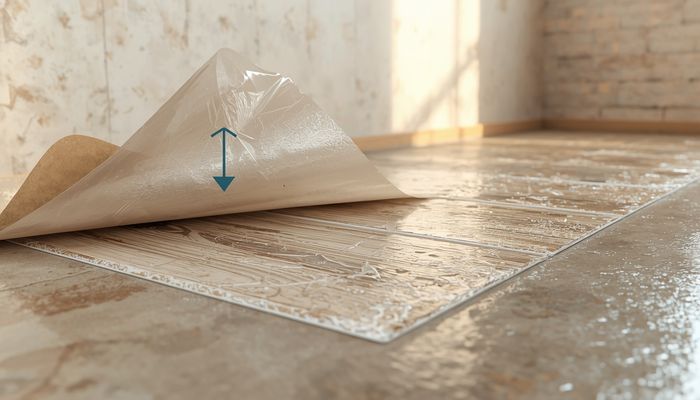
A vapor barrier blocks water vapor — invisible moisture suspended in air — from migrating through building assemblies. The key word is vapor, not liquid. If you have liquid water, you need waterproofing, not a vapor barrier. Different products, different problems.
Vapor barriers are rated in perms. The lower the perm rating, the less vapor gets through. A true vapor barrier is anything with a perm rating of 0.1 or less. 6-mil polyethylene — the clear plastic sheeting you buy by the roll at Home Depot for about $25 per hundred square feet — has a perm rating of about 0.06. That’s essentially zero. Nothing gets through.
There’s a whole spectrum:
- Class I vapor barrier (0.1 perms or less): 6-mil poly, foil-faced rigid foam, sheet metal. These are impermeable.
- Class II vapor retarder (0.1 to 1.0 perms): Kraft paper facing on fiberglass batts, some vapor-retarder paints. Allows minimal drying.
- Class III vapor retarder (1.0 to 10 perms): Latex vapor-retarder primer, some building papers. Allows some drying but still limits vapor flow.
Standard half-inch drywall with latex paint? About 5 to 10 perms. It breathes. Plywood sheathing? Maybe 0.5 to 1.5 perms depending on thickness. Concrete? About 3 perms for an 8-inch wall — it’s actually fairly vapor-open, which is why basement moisture is so common.
The Wrong-Side-of-the-Wall Debate
Here’s the rule that everyone repeats and half the people get wrong: put the vapor barrier on the warm side of the wall. In cold climates, that means the interior. In hot-humid climates, that means the exterior.
This rule is true for above-grade walls with standard stud-and-cavity construction. In Minnesota in January, the interior air is 70 degrees and fairly humid from cooking, showers, and breathing. The exterior sheathing is 10 degrees. Moisture wants to move from warm and wet to cold and dry. Put the barrier on the interior, and it stops that vapor before it condenses inside the wall cavity.
But my basement situation? The “warm side” flips with the seasons. In winter, the basement is warm and vapor wants to move outward. In summer, the soil is warm relative to the air-conditioned basement, and vapor wants to move inward. If you put an impermeable barrier on either side, you trap moisture against that barrier during the opposite season. The wall can’t dry in both directions.
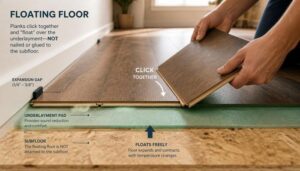
This is why building science people argue endlessly about “flow-through” assemblies — walls designed to dry to at least one side regardless of season. The newer thinking, which I wish I’d known about before my basement project, is that in mixed climates and below-grade applications, you often shouldn’t use a poly vapor barrier at all. Use a vapor-retarding material that still allows some drying — like rigid XPS foam board against the concrete (R-10, perm rating around 0.6 to 1.1, which is Class II) with unfaced fiberglass in the stud bays and standard drywall over it.
Crawl Spaces: A Different Animal Entirely
Crawl spaces are where vapor barriers are genuinely non-negotiable, but not on the walls — on the ground.
I have a rental property with a 900-square-foot dirt crawl space. When I bought it in 2018, the humidity in that crawl was 82 percent in August. The floor joists were growing mold. The fiberglass insulation between the joists was sagging and damp, which means its R-value was basically zero. Wet fiberglass doesn’t insulate anything.
The fix was straightforward: lay a heavy vapor barrier over the entire dirt floor, run it up the foundation walls about six inches and attach it with concrete nails and furring strips, and seal all the seams with butyl tape. I used Stego Crawl 15-mil — it’s expensive at about 15 cents per square foot, but it’s puncture-resistant and it actually stays in place when you have to crawl on it. Home Depot sells a Husky 10-mil barrier for about half that price that works fine for most residential applications.
After sealing the ground, I closed the foundation vents permanently (this is critical — vented crawls in humid climates pull in outside moisture and make everything worse), and installed a dehumidifier set to 55 percent. The crawl now stays at about 58 percent humidity year-round. The floor above is noticeably warmer. The tenants stopped complaining about cold floors.
I did not insulate the crawl space walls — the house is in Massachusetts and the crawl is unconditioned, so the insulation belongs in the floor joists above. In the South, the approach is often reversed: you insulate the walls and bring the crawl into the conditioned envelope. Different climate, different strategy.
House Wrap: The Other Moisture Barrier
People confuse vapor barriers with house wrap constantly. They’re not the same thing.
House wrap — Tyvek is the most common brand — goes on the exterior of a house under the siding. Its job is to stop liquid water from rain and snow while allowing water vapor to escape. Tyvek HomeWrap has a perm rating of about 28 to 58 — incredibly vapor-open. That’s by design. If moisture gets into your wall cavity (and it will, somehow, eventually), it needs to be able to dry to the outside. Tyvek lets that happen.
A vapor barrier with a 0.06 perm rating on the outside of a wall would trap moisture inside the cavity with nowhere to go. That’s how you get rot behind brand-new siding.
I’ve seen this mistake too. A neighbor put 6-mil poly under his new vinyl siding “for extra protection.” Two years later, the OSB sheathing was black with mold. His siding contractor should have known better, but the guy was a siding guy, not a building science guy.
What I Do Now
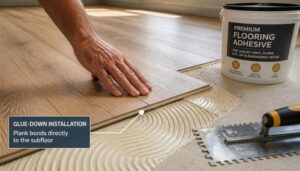
For basement walls: 2-inch XPS rigid foam (Owens Corning Foamular or Dow Styrofoam) against the concrete, seams taped with Tyvek tape or a foil tape. Then a 2×4 stud wall in front of it with unfaced R-13 fiberglass, then drywall. The XPS acts as both insulation and a vapor retarder while still allowing the wall to dry to the interior. No poly sheet anywhere. This is the assembly that won’t trap moisture, regardless of which direction the vapor drive goes.
For crawl spaces: 10-mil or thicker polyethylene on the ground, sealed at seams and edges. No wall insulation unless you’re fully encapsulating and conditioning the space.
For above-grade walls in cold climates: CertainTeed MemBrain or similar smart vapor retarder. It’s a nylon sheet that changes its perm rating with humidity — when humidity is low in winter, it’s a vapor barrier at less than 1 perm. When humidity spikes in summer, it opens up to more than 10 perms and lets the wall dry to the interior. It costs about $120 for a 500-square-foot roll, which is more than poly but a hell of a lot cheaper than gutting a wall.
If I could go back to that basement with the 2x4s and the roll of 6-mil poly, I’d put the poly back in the truck, drive to the lumberyard, and buy rigid foam instead. I’d be $4,200 richer and I wouldn’t know what black mold smells like up close.
Thanks for this breakdown. Bookmarked for my upcoming project — exactly what I needed.
Thanks for this breakdown. Bookmarked for my upcoming project — exactly what I needed.