
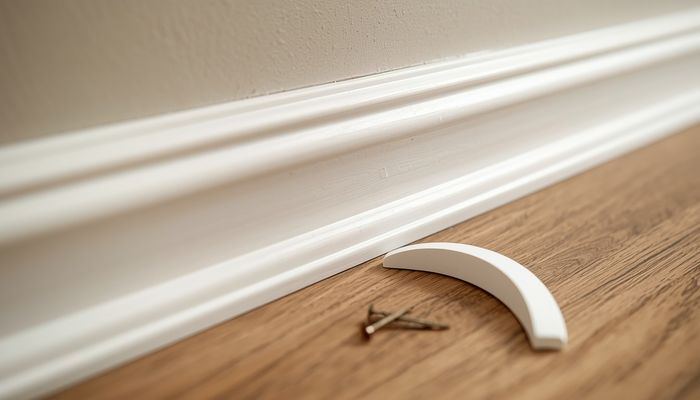
I Left a Gap Between My Floor and Baseboard for Three Years
When I installed laminate flooring in my first house, I did what the instructions said: leave a 3/8-inch expansion gap around the perimeter. But I never covered it. For three years, every time I looked at the baseboards in my living room, I saw that dark gap — collecting dust, trapping crumbs, and silently judging me.
Quarter round is the thing that covers that gap. It’s a small piece of trim — usually 3/4-inch by 3/4-inch — shaped like one quarter of a circle (hence the name). It’s the cheapest, simplest trim in the house, and it solves one of the most visible problems in flooring. Here’s what I wish I’d known when I finally got around to installing it.
Quarter Round vs Shoe Molding: Not the Same Thing
I used to think they were interchangeable. They’re not. Quarter round is exactly a quarter circle. Shoe molding is slightly taller than it is wide — maybe 3/4-inch tall by 1/2-inch deep — with a curved profile. Shoe molding hugs the baseboard more tightly because the narrower profile doesn’t stick out as far into the room.
The practical difference: if your floor has any waviness (and it does), quarter round will show gaps where the floor dips because it’s rigid in both dimensions. Shoe molding is more flexible vertically and conforms to the floor better. I use shoe molding now for everything. It looks more finished and hides floor imperfections better.
Price: quarter round runs about $0.60-$0.90 per linear foot in primed pine. Shoe molding is $0.80-$1.20. The difference on a 100-linear-foot room is about $30. Buy the shoe molding.
The Miter That Made Me Buy Extra
Installing quarter round or shoe molding seems simple — it’s just tiny trim, right? The corners are where it gets you. Inside corners should be coped, not mitered. Outside corners should be mitered.
Coping means you cut one piece square (flat against the wall) and cut the profile into the other piece with a coping saw so it fits over the first piece like a puzzle. It takes longer than a 45-degree miter but it never opens up. A mitered inside corner will separate within one heating season as the wood shrinks. I learned this the first winter when every inside corner in my house developed a 1/16-inch gap.
For outside corners: cut both pieces at 45 degrees and glue the joint before nailing. The glue keeps the miter from separating when someone kicks it (and someone will kick it — quarter round lives at floor level where feet and vacuums constantly hit it).
I buy 20% more than I measure. Quarter round is cheap and you will mess up corners. The $15 you spend on extra material is less than the gas and time of a second trip to Home Depot. I have a stack of cut-too-short quarter round pieces in my garage that I use as paint stirrers now.
Paint Before You Install
This is the single best tip I can give you. Paint or stain the quarter round before you nail it up. Trying to paint it on the floor while masking off the baseboard and the flooring is a special kind of misery. Lay the pieces out on a pair of sawhorses, paint them all at once, let them dry, then install. Touch up the nail holes with a tiny brush afterward. This saved me about four hours on my last room.
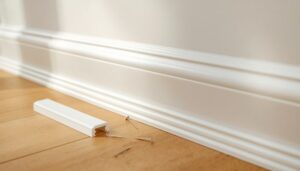
Caulk Is Not Optional
The top edge of the quarter round — where it meets the baseboard — needs caulk. Paintable acrylic latex caulk (Alex Plus, $3 a tube) fills the hairline gap and makes it look seamless. The bottom edge — where it meets the floor — should NOT be caulked. The floor needs to move with humidity changes. If you caulk the quarter round to the floor, it’ll tear within a month and look worse than the gap did.
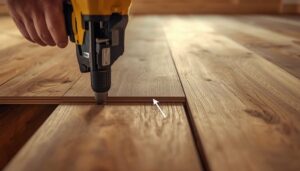
I use a 16-gauge finish nailer (Ridgid, $90) with 1.5-inch nails. You can use a hammer and finish nails, but you’ll dent the trim about 40% of the time unless you have surgeon hands. I don’t. The nailer is faster and the holes are smaller to fill.
Quarter round is genuinely one of the easiest improvements you can make to a room. It takes a weekend, costs maybe $80 in materials for an average room, and it’s the difference between “I did the floor myself” and “a professional did this floor.” The gap in my living room is finally gone. It only took me three years.

Thanks for this breakdown. Bookmarked for my upcoming project — exactly what I needed.
Used luxury vinyl in three flips last year. Quick to install and instantly makes a house look updated.