
The first time I tried to cope a baseboard corner, I cut the wrong side of the miter and ended up with a piece of MDF that fit exactly nowhere. I stood there in my living room at 10 p.m. on a Tuesday, surrounded by sawdust and 14-foot lengths of primed trim, holding what looked like a jagged wooden spear and wondering if I’d made a $400 mistake.
That was three houses ago. I’ve since installed baseboards in every room I’ve ever lived in, made every mistake a person can make with a miter saw, and developed some genuinely strong opinions about quarter round. Here’s what I wish someone had told me before I started.
Why I Even Started Messing With Baseboards
I bought my first house in 2016. It was a 1972 split-level with the original 2-and-1-quarter-inch ranch-style baseboards — that skinny, beveled-top profile that screams “nobody has updated this house since Nixon was president.” The baseboards were yellowed, gouged, and painted so many times the profile was practically rounded. When I pulled up the carpet to install Bruce engineered hardwood (that’s a whole other story), the baseboards had to come off anyway. Half of them cracked during removal because whoever installed them in 1972 used ring-shank nails every four inches like they were building a deck.
I figured: how hard can baseboards be? You cut some boards, you nail them to the wall. My first room — a 10×12 spare bedroom — took eight hours and still had corners I’d caulked so heavily they looked like frosted cake trim.
Material Decisions That Actually Matter
I’ve now used three types of baseboard material across different rooms:
MDF (medium-density fiberboard). This is what I used in my first house and what I use now on painted trim. I buy the 5-and-1-quarter-inch primed MDF from Home Depot — it’s about $1.10 per linear foot for the standard colonial profile. MDF is dead straight, doesn’t warp, doesn’t have knots, and paints beautifully. The downside: if water touches it, it swells like a sponge. I had a dishwasher leak in my current kitchen, and the MDF baseboard in front of the dishwasher turned into oatmeal within hours. In any room that might get wet (bathroom, laundry, kitchen near appliances), I now refuse to use MDF.
Primed finger-joint pine. This costs more — about $1.80 per foot at my local lumberyard for the same 5-and-1-quarter-inch profile — but it handles water better than MDF. I used this in my bathrooms and laundry room. The catch: finger-joint pine has small seams every few feet where the pieces were joined, and those seams can telegraph through paint over time as the wood expands and contracts. I can see faint lines on my bathroom baseboards if I look closely. Most people won’t notice, but I do.
Poplar. For my living room and dining room, I splurged on poplar. It’s a hardwood that paints like a dream — smooth, no grain raise, no seams showing through. I paid about $2.60 per linear foot for a 5-and-1-half-inch flat-stock profile from a local millwork shop. If you’re staining your baseboards instead of painting, poplar or oak is your only real option (MDF can’t be stained). The poplar baseboards in my living room have been up for three years and they’re still flawless.
The one material I’ve never tried is PVC. A friend used Azek PVC baseboards in his basement that floods occasionally and swears by them — they looked fine when I saw them, but up close you can tell they’re plastic. If you have a legit moisture problem, PVC might beat everything else.
The Coping Revelation
Inside corners are where baseboard installs go to die. My first attempt I mitered both sides at 45 degrees. It looked perfect for about three months. Then winter came, the heat kicked on, the wood shrank, and my beautiful 45-degree miter opened up into a gap you could slide a quarter through. I filled it with caulk, but caulk shrinks. I caulked it again. It still looked bad.
The solution is coping. You cut one piece straight against the wall, then cut the mating piece with a coping saw to match the profile. It sounds like advanced carpentry but it’s genuinely not hard once you do three or four of them. The trick nobody mentions: you need a real coping saw with a sharp blade (I like the Olson coping saw, about $15 on Amazon), not the dull thing that’s been hanging in your garage since 1998. And you back-cut at a slight angle — about 5 degrees — so the front edge of the coped piece makes a tight line against the other piece even if the corner isn’t exactly 90 degrees.
I coped 27 inside corners in my current house. The first three looked terrible. Numbers four through eight were acceptable. After that, I could knock one out in three minutes. The key is patience and a sharp blade.
Outside corners you just miter at 45 degrees and glue the joint. Use Titebond Quick and Thick — it fills minor gaps and sets in about 10 minutes so you can sand and move on.
Tools That Actually Made the Difference
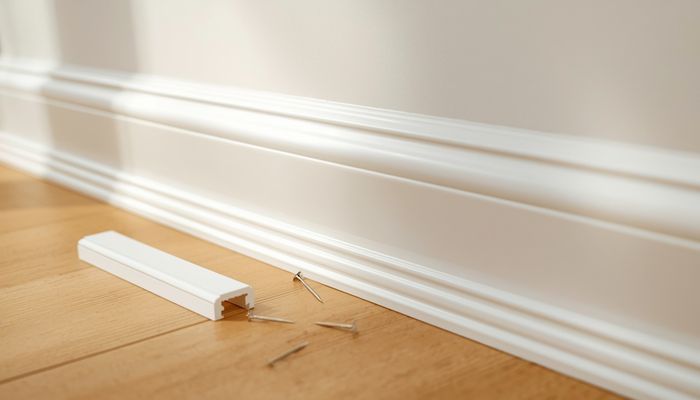
Here’s exactly what I use now: a 12-inch Dewalt compound miter saw (the DW715, about $299 at Home Depot — the 10-inch version is fine if you’re only doing baseboards, but the 12-inch cuts crown molding flat which I needed later), an 18-gauge pneumatic nail gun (I have the Bostitch BTFP12233 combo kit, $199, which comes with a compressor — I’ve shot probably 15,000 nails through it and it still works), a coping saw with fresh blades, an Empire 6-inch combo square for marking reveals, and a Wiss aviation snips if I’m dealing with shoe molding that needs metal cutting. The one tool I didn’t think I needed: a stud finder. I use a $25 Zircon StudSensor. Baseboards need to nail into studs, not just drywall, or they’ll pop loose in a year. Every 16 inches, hit a stud.
Quarter Round vs. Shoe Molding and Other Decisions
I hate quarter round. I think it looks like an afterthought, because it usually is. Quarter round is what you install when your floors are uneven and your baseboards don’t sit flush. It hides the gap but it also screams “I didn’t want to scribe my baseboards to the floor.”
Shoe molding is thinner and more elegant — about half inch by three-quarter inch, with a gentler profile than quarter round. If you absolutely need something at the floor transition, shoe molding is the better-looking option. I have shoe molding in my kitchen where the oak floors are 60 years old and nothing is flat.
In an ideal install, you remove the baseboards before putting down new flooring, install the flooring leaving a three-eighth-inch expansion gap at the walls, then reinstall the baseboards to cover that gap. No quarter round, no shoe molding — just clean baseboard meeting clean floor. I managed to do this in one room in my entire house. The rest have shoe molding. Some truths you just accept.
What It Actually Cost
Let me give real numbers. My living room is 14×18 feet, so about 64 linear feet of baseboard. I used 5-and-1-half-inch poplar at $2.60 per foot: $166 for material. One gallon of SW ProClassic semi-gloss at $72 (I painted them before install on sawhorses in the garage). Caulk, wood filler, sandpaper, coping saw blades: maybe $30. I already owned the saw and nail gun. Total out of pocket: about $268. Time: one full Saturday.
The same room in MDF would have cost about $100 in material. The same room hired out to a trim carpenter would have been $400 to $600 in labor alone around here (Midwest, medium cost of living).
What I’d Tell Myself If I Could Go Back
Don’t start in the most visible room. Start in a closet. You’ll learn how to cope, how to measure, how to handle the nail gun, and nobody will ever see the mistakes except you, twice a year when you reach for the winter coats.
Paint before installing. I painted my baseboards flat on sawhorses with a 4-inch microfiber roller before they ever touched the wall. You still have to fill nail holes and caulk and do touch-up paint after install, but that’s a hundred times easier than cutting in paint between baseboard and wall with a brush after the fact.
And most importantly: the gap between baseboard and wall at the top gets caulked. The gap at the bottom does not. The bottom needs to breathe because floors move. I caulked my first baseboard install at both top and bottom and within one heating season the bottom caulk had pulled away from the floor in a dozen places and looked worse than if I’d left it alone.
Last winter my brother-in-law bought his first house and asked me to help with baseboards. We coped his first corner together, I showed him the back-cut trick, and he got it on the third try. By the end of the afternoon we’d done the whole downstairs while his wife made chili. He sent me a photo last month — everything was still tight, no gaps, even through a full seasonal cycle. That felt better than any room in my own house.


Interior designer here — I specify primer on every project. The difference in color vibrancy and coverage is night and day.
Used to skip primer to save $10. Then painted over dark red with one coat of ‘paint + primer’ and could still see the red through THREE coats.