
Three years ago I laid down about 900 square feet of engineered hardwood in my living room and dining area. I was so proud of that floor. The planks clicked together beautifully, the color was perfect, and I finished the whole thing in a weekend. What I didn’t do? I didn’t put down underlayment. The subfloor looked fine to me. Flat enough. Dry enough. Why spend an extra two hundred bucks on foam I’d never see?
Two winters later, the seams started buckling. Not all at once — just a couple spots near the sliding door, then near the kitchen threshold. By spring I had half a dozen humps you could stub your toe on. I pulled up one plank to investigate and found exactly what you’d expect: moisture from the concrete slab had been seeping up and the boards had been soaking it in like sponges. The underlayment I’d skipped would have blocked that moisture. Instead I tore out and replaced the whole floor. That was a $3,200 lesson in why the stuff beneath your floors matters.
What Underlayment Actually Does
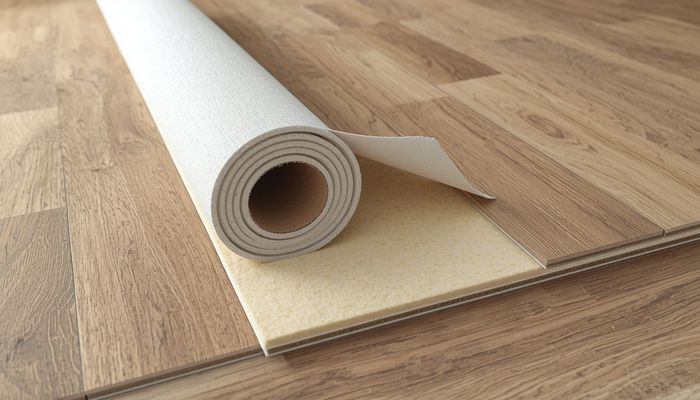
Underlayment is that thin layer between your subfloor (or concrete slab) and your finished flooring. For flooring it’s usually foam, cork, rubber, or felt. For roofing it’s asphalt-saturated felt or synthetic sheet goods. Either way, it does three or four jobs at once and you don’t see any of them.
For floors, the big one is moisture. Concrete slabs breathe — they wick groundwater vapor upward, and without a barrier that moisture goes straight into your hardwood, laminate, or LVP. It causes warping, cupping, mold, and adhesive failure. A good underlayment with a built-in vapor barrier stops that.
Then there’s sound. I’ve lived in apartments where you could hear every footstep from upstairs like a drum solo. That’s what happens when flooring sits directly on subfloor with nothing to dampen vibration. Cork underlayment in particular can cut noise transfer by half.
It also smooths things out. No subfloor is perfectly flat, and those tiny dips and humps telegraph through to your finished floor over time. Foam underlayment compresses just enough to absorb that. Lastly, it adds a bit of thermal insulation — not huge, but noticeable when you’re walking barefoot in January.
For roofs, underlayment is the secondary waterproofing layer. Shingles are the primary defense, but if wind rips a few off or ice dams form at the eaves, the underlayment keeps water out of your attic. It also protects the roof deck during construction if rain hits before the shingles go on.
The Materials You’ll Actually See at Home Depot
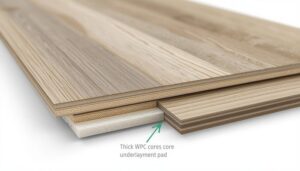
Walk down the flooring aisle and you’ll find a few main types. Foam is the cheapest and most common — thin polyethylene or polypropylene rolls that come in 100-square-foot packages for around $0.25 to $0.60 per square foot. That’s what I should have used under my engineered hardwood. Cork runs $1 to $3 per square foot and is excellent for soundproofing between floors. Rubber underlayment ($0.80 to $2 per square foot) is heavy, dense, and ideal for basements or gym floors where moisture is a constant concern. Felt — either traditional asphalt felt or synthetic — is mostly a roofing product but some homeowners use it under hardwood as a vapor retarder.
For tile, cement board or an uncoupling membrane like Schluter Ditra serves as the underlayment. Ditra runs about $1.50 per square foot and is worth every penny if you’re tiling over concrete because it decouples the tile from slab movement and prevents cracks.
When You Absolutely Cannot Skip It
Any time you’re installing over concrete, you need a vapor barrier underlayment. Period. Concrete wicks moisture forever — it doesn’t dry out and stay dry. Laminate and engineered wood will fail within a few years without it. If you’re on a second floor, the moisture concern is less but sound transmission becomes the issue. If you’re putting down luxury vinyl plank, many brands have attached underlayment on each plank already, but check the specs — if you’re over concrete you might still need a separate vapor barrier.
And here’s one most DIYers don’t know: many flooring manufacturers require specific underlayment to keep the warranty valid. Skip it and your 25-year warranty is void before you even move the couch back in. I learned that one the hard way too.
Installation Isn’t Hard, But You Can Still Mess It Up
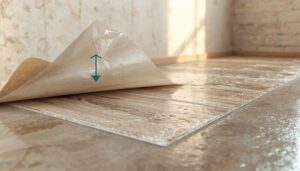
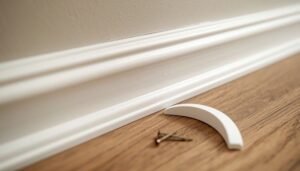
Roll it out perpendicular to your flooring direction so the seams don’t line up. Overlap the edges by a couple inches. Tape the seams — use the tape the manufacturer recommends, not duct tape. Don’t double-layer it unless the instructions say to. And clean the subfloor first: a stray screw or pebble will eventually telegraph through and you’ll feel it underfoot for years.
For roofing underlayment, synthetic is easier to work with than felt — lighter, stronger, less likely to tear when you’re walking on it. Overlap the courses shingle-style starting from the bottom so water runs off rather than under. Cap nails every 12 inches, closer at the eaves.
I’ve now installed flooring with proper underlayment in three rooms since that disaster, and the difference isn’t subtle. The floors feel quieter and more solid, and I don’t lie awake wondering if my moisture barrier is imaginary. Underlayment costs maybe $200 to $500 for an average room. Replacing a buckled floor costs thousands. That math is pretty easy once you’ve lived through the wrong side of it.
Does this work well in humid climates? I’m in the South and moisture is always a concern.
Used luxury vinyl in three flips last year. Quick to install and instantly makes a house look updated.