
Eight hours. That’s how long it took me to scrape 200 square feet of popcorn ceiling in my living room. My arms felt like they were going to fall off. Every muscle between my shoulders and my wrists was screaming. And the dust — I was still finding white powder on furniture two weeks later, even though I’d taped plastic sheeting floor to ceiling and wore a respirator the whole time.
That was my first house, a 1972 split-level ranch in Indiana. Three bedrooms, two baths, and popcorn ceilings everywhere. I was 27 and thought I knew everything. I knew nothing.
Now I’ve dealt with popcorn ceilings in four different houses over 15 years of DIY renovation. I’ve scraped them, skim-coated over them, and drywalled over them. Here’s what I wish someone had told me before I picked up that first scraper.
Why Your House Probably Has Popcorn Ceilings
Popcorn ceilings — some people call them cottage cheese ceilings or acoustic ceilings — were the default builder finish from about 1950 through 1985. Builders loved them because they hid bad drywall work. Instead of paying a skilled finisher to do a level-5 smooth ceiling (expensive, time-consuming), you could just spray a textured mixture through a hopper gun in about 15 minutes per room and walk away. The bumpy surface scatters light so you can’t see seams, nail pops, or uneven taping.
The texture itself is basically drywall compound or paint mixed with little bits of stuff to create the bumps: vermiculite, polystyrene beads, or — before 1978 — asbestos fibers. They added asbestos because it was cheap, made the mixture bind together better, and gave it some fire resistance. Nobody knew or cared about the health consequences.
My 1972 house had asbestos in the popcorn. I didn’t test it before scraping — I just assumed it was fine because the previous owner had painted over it. That was stupid. Painting seals the texture but doesn’t make it safe to scrape. If your house was built before 1978, you have to test. Period. A mail-in kit costs about $40 from a place like EMSL Analytical. You scrape a small sample into a baggie and they email you results in a few days. The $40 is worth knowing you won’t give yourself mesothelioma.
The Removal Process (When It Goes Right)
My second popcorn ceiling — a basement rec room in a 1983 house — did not contain asbestos. I verified this before touching it. Here’s what I did differently.
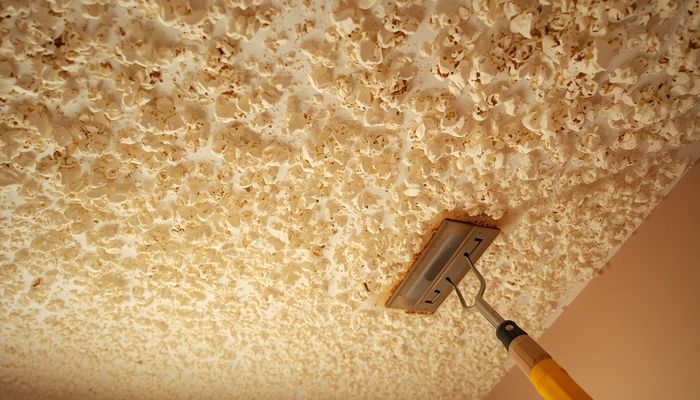
First, I bought a garden pump sprayer. Not the little hand-held bottle — a real 2-gallon pump sprayer with a wand, the kind you use for weed killer. Filled it with warm water and a splash of dish soap. The soap breaks the surface tension so the water soaks in better. I sprayed a 4-by-4-foot section until it was damp but not dripping, waited about 10 minutes, then tested with a wide drywall knife. If the texture scrapes off easily like wet oatmeal, you’re good. If it’s fighting you, wait another 5 minutes.
The trick is not to soak the drywall underneath. If you get the drywall paper wet, it’ll bubble and you’ll be mudding and sanding for days. Just dampen the texture itself. Keep a painter’s tray or garbage can directly below where you’re scraping to catch the glop as it falls. Wear a Tyvek suit ($12 at Home Depot) and a proper P100 respirator, not a paper N95. The dust is incredibly fine and gets everywhere.
That basement ceiling — about 300 square feet — took me five hours. Not eight. I was faster because I’d learned to spray more aggressively and scrape immediately while the texture was still wet, not waiting for it to “soak.” Once it starts to dry, it gets hard again and you’re fighting it.
When Removal Goes Wrong
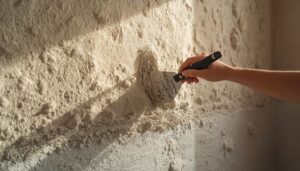
My current house, a 1960s ranch, had popcorn ceilings in the hallway and one bedroom that had been painted with latex paint — probably twice. Painted popcorn is a completely different animal. Water won’t penetrate the paint layer, so the spray-and-scrape method doesn’t work. You’re basically trying to scrape hardened, painted lumps off a ceiling with a putty knife. It’s like chiseling concrete. I tried it for about 20 minutes and then called it.
For painted popcorn, you have three options, none of them great:
Option A: Skim coat. Spread thin layers of all-purpose joint compound over the entire ceiling to fill in the texture and create a smooth surface. This is tedious as hell but it works. For a 150-square-foot bedroom, plan on three coats with drying time between each. You’ll need a 12-inch drywall knife and a mud pan. Total material cost about $60 for a gallon of Plus 3 joint compound and some sanding screens. Time: two weekends if you’re doing it evenings after work.
Option B: Cover with new drywall. Screw 1/4-inch drywall right over the popcorn, tape and mud the seams, paint. This is actually faster than skim coating and gives you a perfect smooth surface. Downside: you lose 1/4 inch of ceiling height, you have to redo all your crown molding and light fixture boxes, and drywall on a ceiling is heavy and awkward. I’ve done this in two rooms. It’s my preferred method when the popcorn is painted. A 4×8 sheet of 1/4-inch drywall costs about $15, so a 12×12 room is maybe $90 in drywall plus mud and tape.
Option C: Hire someone. For asbestos popcorn, this is your only smart option. Professional abatement costs $5 to $15 per square foot. A 200-square-foot living room is $1,000 to $3,000. It stings the wallet, but pleural mesothelioma stings worse. Contractors seal the room with negative air pressure, wear full hazmat suits, and dispose of the waste through licensed channels. It’s not DIY territory.
The Test Kit That Saved Me
When I bought my current house in 2019, I tested the popcorn in every room before closing. Four rooms came back clean. The hallway ceiling tested positive for 2% chrysotile asbestos. That one cost me $900 for professional abatement on about 80 square feet. The contractor finished in four hours and I never had to worry about it again. Worth every penny.
For anyone dealing with a popcorn ceiling right now: stop reading this and order a test kit if your house was built before 1978 and you haven’t tested yet. Seriously. Go do it. I’ll wait.
Just Cover It
If I had to give one piece of advice to someone staring at a popcorn ceiling, it’s this: cover it unless you absolutely have to remove it. The dust, the mess, the neck pain, the cleanup — it’s not worth the misery when 1/4-inch drywall and some mud will give you a perfect ceiling for about $150 in materials and a weekend of work. Or pay a drywaller $500 to do it. Either way, you’ll be happier than you would be scraping overhead for an entire day while grit rains down on your face.
I’ve scraped my last popcorn ceiling. Next time, I’m screwing drywall over it and moving on with my life.

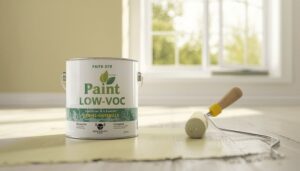
Property manager here — I require all my painters to use low-VOC on my units. Tenants complain less about smell and we can rent faster after painting.
Nobody talks about transition strips until you NEED one and suddenly you’re at the hardware store staring at 15 different profiles.