
The first time I tried to match knockdown texture, I was standing in my garage at 11pm with a borrowed hopper gun, an underpowered pancake compressor, and way too much confidence. I had watched exactly one YouTube video and figured, how hard could it be? You spray mud on the wall, you knock it down. Done.
Two hours later my garage looked like a crime scene. The compressor couldn’t keep up so the spray pattern went from fine mist to spitting globs every thirty seconds. Half the mud dried before I could knock it down because I was working too slow. The other half I knocked down too early and just smeared everything into a muddy mess. My wife came out, looked at the wall, and said “it looks like cottage cheese that’s been sat on.” She wasn’t wrong.
That was three houses and probably a dozen rooms ago. I’ve since gotten decent at knockdown texture — not pro level, but good enough that people ask who did the work. I’ve also made every mistake possible along the way. Here’s what actually matters if you’re thinking about knockdown for your own walls or ceilings.
What Knockdown Texture Actually Looks Like
Forget the technical descriptions. Knockdown looks like someone sprayed thinned drywall mud on the wall and then flattened it with a big knife. The result is a pattern of irregular flat spots separated by shallow valleys — kind of like a stucco wall that got pressed down, or leather that’s been stretched out.
It’s not orange peel. Orange peel is what you get if you spray and walk away — a fine, uniform bumpiness like the skin of an actual orange. Knockdown has more character than that. The flattened areas catch light differently than the valleys, so the wall has subtle movement depending on where you’re standing. It’s more interesting than a smooth wall but not as aggressive as a skip trowel or — god forbid — popcorn.
In my current house I’ve got knockdown on two bedroom ceilings and an accent wall in the living room. The living room wall gets comments from visitors. The ceilings just sort of disappear, which is exactly what you want from a ceiling.
The Gear You Actually Need
You can rent everything from Home Depot for about $60 a day, but if you’re doing more than one room, buying makes more sense. Here’s what I use:
Hopper gun. I bought the $40 Goldblatt model from Amazon after my rental unit clogged on me twice. It’s nothing fancy but it works. Whatever you get, make sure the nozzle sizes are adjustable — you want a #6 or #8 orifice for knockdown.
Air compressor. This is where I messed up the first time. A pancake compressor (the little 6-gallon kind) cannot keep up with a texture gun. You need at least a 20-gallon tank and ideally something that pushes 4-5 CFM at 90 PSI. I run a 30-gallon Husky that I picked up used for $200. Even that cycles on and off while I’m spraying.
Knockdown knife. Get the widest one you can find — 18 inches minimum, 24 is better. A plastic knockdown knife with a curved edge is worth the $25. It glides over the texture without digging in. I used a regular 12-inch taping knife the first time and gouged lines into everything.
Mud and mix. All-purpose joint compound (the green lid from USG, about $15 for a 4.5-gallon bucket) thinned with water. You want pancake batter consistency — when you lift the mixing paddle, the mud should drip off in a steady stream, not a slow blob. Too thick and it won’t spray. Too thin and it runs down the wall. I add water slowly, mix with a drill paddle for a full minute, then test on a scrap piece of drywall before touching the actual wall.
How It’s Done (With Real Mistakes Included)
The basic sequence is straightforward: prep, spray, wait, knock down, prime, paint. But the timing is everything.
Prep. The wall needs to be taped and sanded smooth before texturing. Knockdown hides small imperfections but it won’t save you from bad taping jobs. Cover the floors, tape off windows and trim, and for the love of everything holy, cover the outlets — dried mud in an outlet is a nightmare to clean out. I also spray a coat of primer before texturing. The texture adheres better to primed drywall and you won’t get the mud sucking moisture out unevenly.
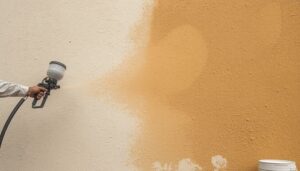
Spraying. Set compressor to about 30-40 PSI. Fill the hopper, point the gun at a steep angle to the wall (not straight on), and move in overlapping sweeps. Don’t stop moving or you’ll dump a pile of mud in one spot. I work in 4-foot by 4-foot sections. Any bigger and the mud starts setting up before I can knock it down.
The waiting game. This is the part YouTube videos gloss over. You need the mud to lose its wet shine but still be soft enough to flatten. In a 70-degree room with average humidity, that’s about 10-15 minutes. In my garage in August it was 5 minutes. In my basement in January it was closer to 25. You just have to watch it — when the surface goes from glossy to matte, grab your knife.
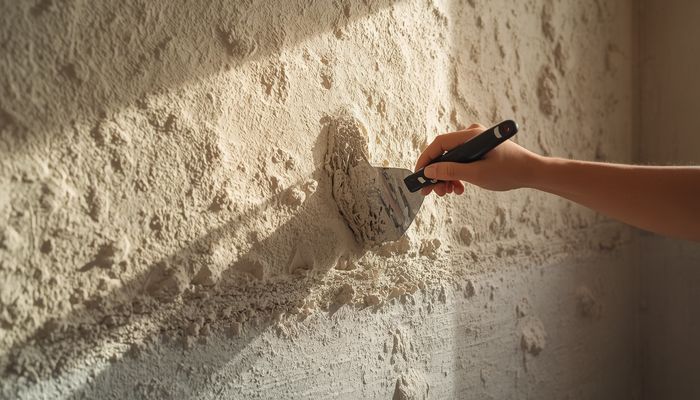
Knocking down. Hold the knife at about a 15-degree angle and drag it across the surface in long, even strokes. Don’t press hard — the weight of the knife is almost enough. You’re just flattening the peaks, not scraping off the texture. Work in one direction (I go left to right) and overlap your passes by about 2 inches. If the mud balls up on the knife, you waited too long. If it smears into a wet streak, you jumped the gun. Wipe the knife clean every few passes.
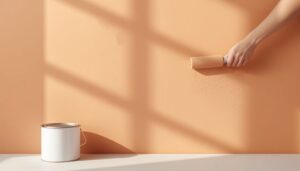
After it dries (24 hours minimum), prime it with a good drywall primer like Kilz PVA or Zinsser Bulls Eye 1-2-3. Unprimed texture drinks paint like crazy — I burned through an extra gallon of Benjamin Moore Regal before I learned that lesson. Two coats of paint over primer and it’s done.
Why Bother With Knockdown At All
Knockdown isn’t the trendiest finish right now — smooth walls are having a moment with the modern farmhouse crowd and the minimalist people. But knockdown still makes sense for a lot of homes, and here’s why I keep using it:
It hides imperfections. My 1970s house has drywall that’s seen better days. There are old nail pops, uneven seams, and patches from when we moved electrical boxes. A smooth wall would show every single one of those. Knockdown masks them without looking like I’m trying to hide something.
It’s repairable. Unlike popcorn, which is basically impossible to patch invisibly, knockdown can be touched up. I’ve fixed ceiling cracks after settling and matched the texture well enough that I can’t find the repair anymore. You spray a little mud, knock it down with a small plastic knife, and it blends in.
It adds depth without being loud. Smooth walls are fine in a modern condo, but in a traditional house they can feel sterile. Knockdown gives walls a handcrafted look that paint alone can’t achieve.
Cost-wise, if you DIY it, you’re looking at maybe $100-150 in materials for an average bedroom (mud, primer, paint, and renting or buying cheap tools). Hiring it out runs $1-3 per square foot in my area, so that same bedroom would be $400-800.
Knockdown vs Everything Else
I’ve tried most common textures at this point. Here’s my honest take:
Orange peel: Easier than knockdown because there’s no knockdown step — just spray and walk away. Less character though. Good for rentals and hallways. Orange peel texture is what’s in my office and I barely notice it.
Skip trowel: Looks gorgeous when done by someone who knows what they’re doing. Looks like a five-year-old finger-painted the wall when done by me. Requires real skill and costs more to hire out. I paid a pro $600 for one bedroom with skip trowel and it was worth every penny, but I wouldn’t attempt it myself again.
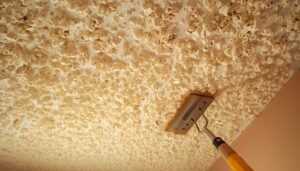
Popcorn: Please don’t. It was popular in the 70s and 80s for a reason (it deadens sound and hides terrible drywall work), but it’s ugly and collects dust like nothing else. Removing it is a special circle of hell if it contains asbestos. I spent a weekend scraping a popcorn ceiling in my first house and I still have nightmares about it.
Smooth finish: The hardest to do well. Every seam, every screw, every imperfection shows. Requires level 5 finishing which most pros charge a premium for. Beautiful when done right, but unforgiving.
Where Knockdown Works Best
Ceilings are the sweet spot for knockdown. It hides the drywall seams that always seem to show up a year after construction, and it doesn’t reflect light from ceiling fixtures the way a glossier texture would. Every bedroom in my house has knockdown ceilings and I’ve never regretted it.
Accent walls are another good use. In my living room, three walls are smooth and one is knockdown — it breaks up the space without being busy. Painted the same color (Sherwin-Williams Agreeable Gray, if you’re wondering), the texture difference is subtle but noticeable.
I’d avoid knockdown in bathrooms regardless of what anyone tells you. Moisture and texture don’t mix well long-term. Same with kitchens — grease and steam will eventually cause problems. And if you’re in a hyper-modern house with floor-to-ceiling windows and concrete floors, knockdown is going to feel out of place.
The biggest mistake I see people make is putting knockdown everywhere. One or two rooms with texture is interesting. An entire house with the same knockdown pattern on every surface is monotonous. Mix it up.
Knockdown texture isn’t for everyone or every house. But if you’ve got imperfect walls, want some visual warmth, and are willing to practice on some scrap drywall first, it’s a skill worth picking up. Just get a real compressor, watch your timing, and keep your knockdown knife clean. And if your first attempt looks terrible — well, you can always scrape it off and try again. I certainly did.
Does this work well in humid climates? I’m in the South and moisture is always a concern.
For flips, fresh paint is the cheapest way to add value. We budget for it on every project.