
Three years ago, my wife and I bought a 1968 split-level. It had that classic “grandma’s house” vibe — avocado green appliances in the kitchen, floral wallpaper in the bathroom, and wall-to-wall beige carpet that smelled faintly of mothballs and regret.
We ripped up the living room carpet on move-in weekend. You know that satisfying moment in home reno shows where they pull back the carpet and reveal gorgeous hardwood underneath? Yeah, that didn’t happen to us. What we found instead was a spongy, water-stained section of subfloor around the bay window that basically crumbled when I poked it with a screwdriver.
That was my introduction to the world of subfloors. I didn’t even know what a subfloor WAS before that day. Now I’ve replaced sections in two rooms, screwed down squeaks in three more, and developed strong opinions about OSB vs. plywood that nobody at parties wants to hear.
Your Subfloor Is the Only Thing Between You and Your Crawlspace
Let me explain this the way I wish someone had explained it to me, without the contractor jargon. In most houses built after about 1950, your floor has three layers:
The joists — these are the big horizontal beams, usually 2x10s or 2x12s, spaced 16 inches apart. They’re the skeleton.
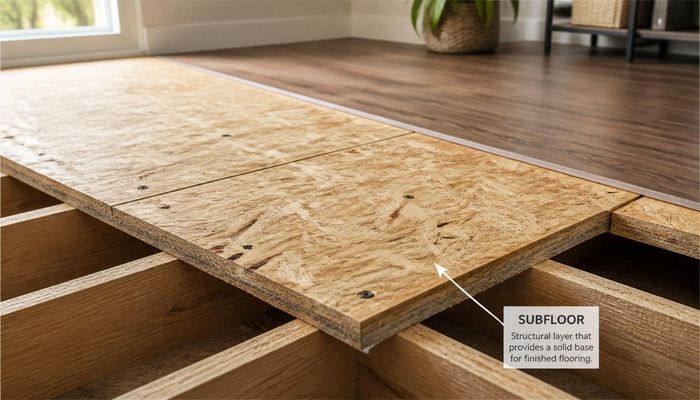
The subfloor — this is the layer of plywood or OSB (oriented strand board, basically wood chips glued together under pressure) that sits directly on top of those joists and gets nailed or screwed down. Standard thickness is 3/4 inch, which is actually labeled as 23/32″ at the lumberyard because the lumber industry apparently hates round numbers.
The underlayment — a thinner layer on top of the subfloor that creates a perfectly smooth surface for your finished floor. Could be 1/4-inch plywood, cement backer board for tile, or a roll of cork or foam.
Then your actual floor — hardwood, tile, vinyl plank, whatever — goes on top of all that.
The subfloor is the one doing the real work. It ties the joists together so they don’t twist, it distributes the weight of your couch and your refrigerator and your uncle who “used to bench 300,” and it’s the surface everything else gets attached to.
The $600 Mistake I Made With OSB
When I replaced that rotted section by the bay window, I bought a sheet of 23/32″ OSB from Home Depot for $29. I was proud of myself. It was cheaper than the $45 plywood sheet sitting next to it. I cut it to size with my DeWalt circular saw, screwed it down with 2-inch construction screws, and patted myself on the back.
Six months later, we had a minor appliance leak from the dishwasher one room over. The water traveled under the flooring and hit my OSB patch. OSB is basically sawdust and glue pressed into a board — and when it gets wet, it swells up like a science fair volcano. The edges of my patch puffed up and created a visible bump under the vinyl plank we’d installed. I had to tear the whole thing out and do it again with plywood.
Lesson learned: OSB is fine for interior subfloors that will NEVER see moisture. But anywhere near a kitchen, bathroom, laundry room, or exterior wall — spend the extra $16 a sheet for exterior-grade plywood. AdvanTech is the gold standard brand (about $55 for a 4×8 sheet of 23/32″), but regular BCX plywood from a big box store works fine if you’re on a budget.
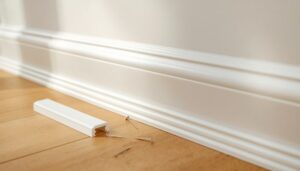
How I Finally Shut Up My Squeaky Hallway
Our upstairs hallway sounded like a haunted house. Every step produced a symphony of squeaks and groans. The problem was the subfloor — specifically, the nails holding the subfloor to the joists had worked loose over 50 years of foot traffic.
Here’s the fix that actually worked, after I tried three other things that didn’t:
I bought a box of #8 x 2-1/2-inch GRK structural screws ($8 for a box of 75 at Lowe’s). These are beefy screws with a self-countersinking head. I went into the hallway from underneath (our basement ceiling is exposed in that area), located every joist, and drove two screws through the subfloor into each joist about every 8 inches.
The difference was immediate. Dead silent. My wife literally jumped up and down in the hallway and nothing made noise.
If you can’t access your subfloor from below (finished ceiling underneath), the “breakaway screw” method works too. You buy special scored screws from a company called Squeeeeek No More ($15 for a kit with 50 screws), drive them through the carpet and subfloor until the head snaps off below the surface, and the remaining shaft pulls the subfloor tight. I used these in our master bedroom and they actually worked. The holes in the carpet are invisible.
The Tile Job That Would Have Cracked Without Proper Prep
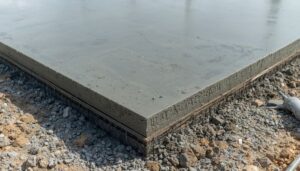
When we tiled our bathroom, the tile guy (an actual professional — I know my limits) refused to lay tile directly on our subfloor, even though it was perfectly flat plywood. He insisted on screwing down 1/4-inch HardieBacker cement board first with thinset underneath it.
I thought he was upselling me. He wasn’t. Tile is rigid and brittle — it doesn’t flex. Wood subfloors flex, even when they feel solid. That tiny amount of movement, over years of temperature cycling and foot traffic, is what cracks tile. The cement board decouples the tile from the subfloor movement.
He charged me $3.50/square foot for the cement board install, including materials. Best money I spent on that bathroom. Three years in, zero cracks.
Things I Wish I Knew Before My First Subfloor Project
The tongue-and-groove edge on plywood subfloor panels actually matters. That T&G edge locks adjacent sheets together so they can’t move independently and squeak. If you buy non-T&G plywood (it’s cheaper), you need to add blocking between joists under every seam. I skipped this once. Those seams squeaked within a month.
Use construction adhesive between the subfloor and the joists. A tube of Loctite PL Premium costs $7 at Home Depot. Run a bead along the top of each joist before you lay the subfloor down, then screw it. The adhesive eliminates the tiny gap between wood and wood that causes squeaks. Every pro I’ve talked to does this. I didn’t do it on my first repair and regretted it.
Stagger your subfloor seams. When you’re laying down multiple sheets, the seams shouldn’t all line up on the same joist. Offset them like brickwork. I had to redo a section because I didn’t stagger and created a weak line across the floor.
So Do You Need to Replace Your Subfloor?
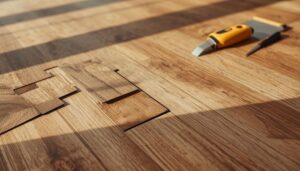
Probably not entirely. Most subfloor problems are localized — a section around a leaky window, a soft spot by the front door, the area in front of the dishwasher. Replacing a 4×4-foot section is totally DIY-able with a circular saw, a pry bar, a drill, and some patience. I did my first patch in about two hours.
Whole-room replacement is a different beast. You’re looking at removing all finished flooring, cutting out hundreds of square feet of subfloor without damaging the joists, and installing new sheets with proper staggering and fastening. If you’re not comfortable setting a circular saw blade depth to exactly 23/32″ — and I mean exactly, because the joists underneath won’t forgive you — hire someone.
I budget about $2.50-$3.00 per square foot for professional subfloor replacement in my area (Midwest), including materials and labor. Yours may vary.
Looking back, the subfloor is probably the least glamorous thing I’ve ever spent a weekend working on. Nobody walks into your house and says “wow, nice subfloor.” But when it’s wrong, everything else goes wrong with it — your $6/square foot LVP buckles, your tile cracks, your house sounds like a ghost story. It’s worth getting right.
Exactly the kind of practical info homeowners need. Clear, concise, and actionable.
Exactly the kind of practical info homeowners need. Clear, concise, and actionable.