Last spring I stood in my living room staring at baseboards that looked like they had been through a war. Scuffed, yellowed, and chipped in places I swear my kids used as a racetrack for their toys. I figured painting trim could not be that hard. How wrong I was the first time.
My first attempt was a disaster. I grabbed a cheap brush from the junk drawer, a can of wall paint I had lying around, and went at it. No sanding, no tape, no plan. The paint slid right off the glossy old finish like water off a duck’s back. Drips everywhere. My wife came home and asked if a toddler had done it. She was not wrong.
I swallowed my pride, did some actual research, and tried again. Round two went much better. Here is what I learned so you can skip my embarrassing first draft.
The Stuff You Actually Need
I walked into Home Depot with a list and walked out about $85 lighter. Here is what mattered and what did not.
The angled sash brush was non-negotiable. I spent $12 on a 2-inch Purdy and the difference was night and day. The angled bristles let me cut in along the wall edge without painting the wall itself. For flat surfaces I used a 4-inch foam roller that cost about $7 with a little tray. It leaves zero texture — way better than those fuzzy rollers that make your trim look like orange peel.
Sandpaper-wise, I bought a pack of 220-grit and a $5 sanding sponge. The sponge was easier to grip and did not kill my fingers after an hour. A tack cloth for $4 to wipe dust, and a roll of FrogTape for $8 because the blue stuff I already had bleeds paint underneath like crazy. The green FrogTape actually seals when the paint hits it.
For actual paint, I grabbed a quart of Kilz water-based primer for $15 and a quart of Behr semi-gloss latex in bright white for $22. Semi-gloss is the move for trim — it wipes clean and does not show every fingerprint. I also picked up a tube of paintable latex caulk for $6 and a cheap caulk gun for $5. Wood filler and a putty knife ran me another $8 total.
I already had drop cloths, a bucket, and gloves at home. If you are starting from scratch, budget $80 to $120 for everything. You do not need the most expensive version of anything — just do not buy the absolute cheapest brush.
How I Finally Got It Right
The real lesson from my failed first attempt: prep is everything. Painting is maybe 30 percent of the work. The other 70 percent is cleaning, sanding, filling, caulking, and taping.
I started by washing every inch of baseboard with warm water and a few drops of dish soap. You would not believe the grime that came off — dust, cooking grease, years of who-knows-what. If you skip this, your paint is bonding to dirt, not wood. Let it dry completely before moving on.
Then I sanded. Light pressure, small circles, just enough to knock the shine off the old paint. The 220-grit sponge made this surprisingly meditative. Twenty minutes per room, max. I wiped everything down with the tack cloth after. Do not use a damp rag — water raises wood grain. Tack cloth or a dry microfiber is the way.
I filled every nail hole and ding with wood filler, let it dry 30 minutes, then sanded those spots flush. Then came caulking — a thin bead along the top edge where trim meets wall. I used my finger dipped in water to smooth it. This step alone made the finished job look professional. No more dark shadows in that gap.
Taping took patience. I ran FrogTape along the wall edge and the floor edge, pressing down firmly with a putty knife. Paint will find any loose spot and bleed under. Ask me how I know.
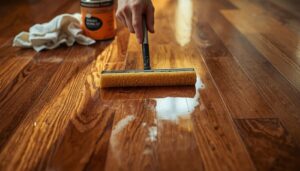
For primer, I cut in the edges with the angled brush — dipping only the first third of the bristles — and rolled the flat parts with the foam roller. One thin coat, not gloppy. It dried in about 90 minutes. I gave it a very light sand with the sponge afterward to knock off any dust nibs.
Two coats of the semi-gloss white went on the same way. Thin coats, not thick. I waited a full three hours between coats even though the can said two. Humidity slows drying and I was not rushing this time. The second coat is where the magic happens — the coverage becomes solid, the sheen evens out, and suddenly your baseboards look like they came with a new house.
I pulled the tape at a 45-degree angle while the second coat was still slightly tacky — maybe 45 minutes after finishing. If you wait until the paint is fully dry, the tape can pull up chunks. Learned that one the hard way too.
Total active work was about five hours spread across a Saturday. With drying time, the project wrapped up Sunday afternoon. One room, roughly 60 linear feet of baseboard and door trim.
Stuff I Wish Someone Had Told Me
Do not caulk after painting. The caulk needs bare or primed surface to grip. Paint first then caulk? Nope — the caulk will peel off. Caulk goes on before the paint, always.
Do not overload your brush. I kept dipping too deep and getting paint up into the ferrule, which makes the brush impossible to clean and ruins the bristles. Dip a third of the way in and tap — do not wipe — the excess off on the can rim.
If you are painting over dark trim with white paint, you absolutely need primer. Two coats of paint alone will not cover it and you will be doing coat number four before you know it. The stain-blocking primer also stops wood knots from bleeding through — I had one knot that kept showing through until I primed over it properly.
My biggest takeaway: this is a totally doable DIY job. It is not physically hard, it is just methodical. Put on some music, do the prep right, and take your time. The before-and-after difference was shocking — my wife admitted it looked like I hired someone. Considering how my first attempt went, that is the best compliment I could ask for.