
My wife still brings up the “great flooring debate of 2019.” We had just bought a house with a kitchen floor that can only be described as tragic — peeling sheet vinyl from the 80s, color somewhere between mustard and regret. I wanted tile. She wanted hardwood. We argued for three weeks.
We both lost. We went with LVT. And honestly? It was the right call.
If you’re staring at a floor you hate and you don’t know what LVT actually is, here’s the real-person version: Luxury Vinyl Tile is synthetic flooring that looks like wood or stone but doesn’t come with any of the maintenance nightmares. It’s waterproof. It’s softer under your feet than tile. And unlike hardwood, you don’t have to have an anxiety attack every time someone spills a glass of wine.
What You’re Actually Buying
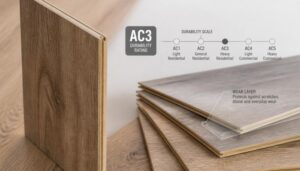
LVT is built like a sandwich, but a very engineered sandwich with four distinct layers. The top is a clear wear layer — measured in “mils” (thousandths of an inch), usually between 12 and 20 mils for residential stuff. The thicker that number, the longer the floor lasts before looking worn. For a house with kids or dogs, get 20 mils. For a guest room nobody uses, 12 is fine.
Under that wear layer is a printed photographic film. This is what gives the floor its look. The printing technology has gotten genuinely impressive — I’ve had guests tap their foot on my kitchen floor and ask, “Is this actually wood?” It’s not. It’s a high-resolution photo of wood fused onto vinyl. Modern LVT from brands like Armstrong, Shaw, and Mannington uses 3D printing techniques that even replicate wood grain texture — little ridges and grooves you can feel.
Below the print layer is the core. This is where things get interesting because LVT cores come in two flavors: flexible and rigid. Flexible core is the older style — it’s bendable, thinner, and needs a perfectly flat subfloor. Rigid core (sometimes called SPC or WPC, depending on the material) is thicker and self-supporting. If your subfloor has minor imperfections — and most do — rigid core is the way to go. It’ll bridge slight dips and bumps that would telegraph right through flexible LVT.
The bottom layer is backing — usually foam or cork. This handles sound absorption and gives the floor a little cushion. It’s also why LVT is noticeably quieter to walk on than laminate or tile. If you live in a multi-story home, the people below you will appreciate this.
The Real-World Test
Let me tell you what happened six months after we installed that kitchen floor. My dog — a 70-pound lab mix with the grace of a wrecking ball — decided to drag his metal food bowl across the kitchen. Claws scrabbling. Bowl scraping. Water splashing everywhere. I walked in expecting disaster.
The floor was wet but completely fine. No scratches from the claws. No water damage. I wiped it up with a paper towel and that was that. If we’d put hardwood in there, I’d have been on my hands and knees with a repair kit and a heavy heart.
That’s the thing about LVT that marketing brochures don’t convey well: it’s not about what it looks like on day one. It’s about what it looks like on day 500, after a year of actual living. Hardwood in a kitchen looks great in photos. In real life, it collects dents from dropped cans, water stains around the sink, and scratches from chair legs. LVT just… doesn’t. Or at least, it takes a lot more abuse before it does.
How Much Is This Going to Cost You?
Decent LVT runs about $3 to $5 per square foot at the big box stores. I paid $3.49/square foot for the Shaw planks in my kitchen. The premium stuff — brands like Coretec or Flooret — pushes toward $6 or $7. For a typical 200-square-foot kitchen, you’re looking at $700 to $1,400 in materials.
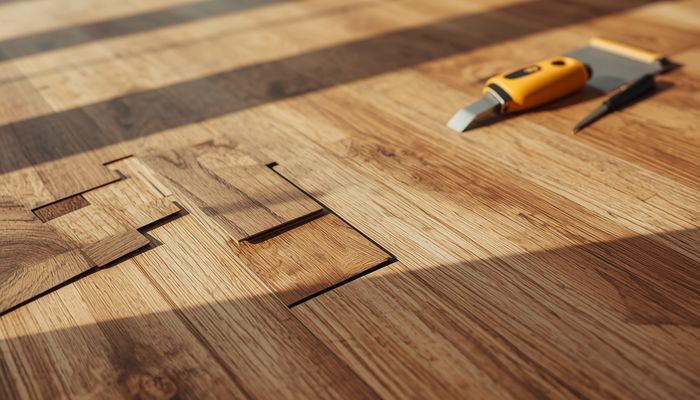
Installation is where you can save real money. Click-lock LVT is genuinely DIY-friendly. I am not an especially handy person. I cannot do electrical work without questioning my life choices. But click-lock flooring? It’s Legos. You snap the planks together end-to-end and side-to-side. The floor floats — no glue, no nails. If you mess up a plank, you pull it out and try again.
A few things I wish someone had told me before I started:
- Buy 10% more than your square footage. Between miscuts and weird angles around doorways, you will need extra. Nothing worse than being three planks short at 9 PM on a Sunday with Home Depot closed.
- Let the boxes sit in the room you’re flooring for at least 48 hours. The planks need to acclimate to the room’s temperature and humidity. Skip this step and you might get gaps at the seams a month later.
- Score and snap with a utility knife. You do not need a saw for LVT — a sharp utility knife and a straight edge will cut through it. Score the wear layer deeply, bend the plank, and it snaps clean.
- Start against the longest, straightest wall. Use spacers. The first row determines whether your entire floor looks professional or crooked.
Where LVT Belongs (And Where It Doesn’t)
Basement, bathroom, kitchen, laundry room — those are the obvious answers. Anywhere that gets wet or humid, LVT is one of the few flooring options that won’t eventually fail. It’s also great in entryways and mudrooms where people track in snow, mud, and salt.
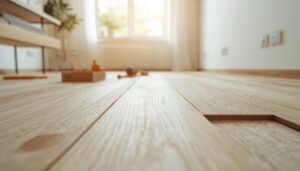
Living rooms and bedrooms are more of a personal call. Some people genuinely prefer the feel of real hardwood. I get that. LVT doesn’t quite replicate the warmth of oak under bare feet on a cold morning — it’s close, but not identical. If you’re selling the house soon, though, LVT in common areas is a solid choice. Buyers like the look and they love the phrase “waterproof flooring” on a listing.
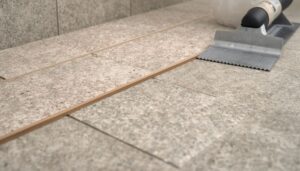
The one place I’d avoid LVT: the actual shower floor. Yes, LVT is waterproof. No, it is not designed for standing water that pools in one spot for hours. The seams between planks — even tight click-lock seams — are not grouted or sealed. Water will eventually find a way through if it sits there long enough. Bathroom floor? Absolutely. Inside the shower pan? Nope. Use tile for that.
Two years into owning this kitchen floor, I’d pick LVT again without hesitation. Not because it’s the most beautiful floor I’ve ever seen — though it looks plenty good enough. Because it’s the floor I never think about. I don’t worry about it. I don’t maintain it beyond sweeping and the occasional damp mop. After a lifetime of flooring that demanded my attention and my anxiety, that’s worth more to me than any aesthetic upgrade.

This answered questions I didn’t even know I had. Great practical advice here.
Used luxury vinyl in three flips last year. Quick to install and instantly makes a house look updated.