
Nail-Down Definition Home Improvement Explained: What It Is and Why It Matters
TL;DR: In home improvement, “nail-down” refers to a method of installing flooring where planks or tiles are mechanically fastened to a subfloor using nails or staples. This technique is common for solid hardwood, engineered wood, and certain types of laminate, providing a permanent, stable, and squeak-free finish. Understanding nail-down installation helps you choose the right flooring method for your subfloor type, budget, and long-term durability needs.
What Is Nail-Down Definition Home Improvement?
“Nail-down” in home improvement specifically describes a flooring installation method where each plank or tile is secured directly to a wooden subfloor using nails, staples, or cleats. Unlike floating floors that click together or glue-down installations that rely on adhesive, nail-down floors are mechanically fastened, creating a rigid, permanent bond.
The term “nail-down definition home improvement” often appears in flooring guides, contractor quotes, and product specifications. It is most commonly associated with:
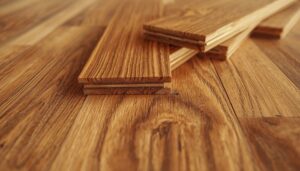
- Solid hardwood flooring (3/4-inch thick)
- Engineered wood flooring (with a thick wear layer)
- Certain laminate flooring (designed for nail-down installation)
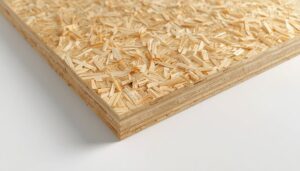
- Plywood or OSB subflooring (the base layer that receives the nails)
Key characteristics include:
- The use of a pneumatic flooring nailer or stapler (rented or purchased)
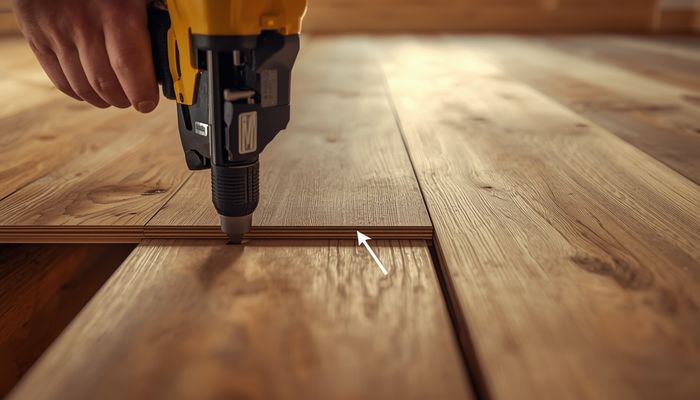
- Nails or staples driven at a 45-degree angle through the tongue of each plank
- The subfloor must be clean, dry, and made of wood (not concrete)
- A vapor barrier is often required over crawlspaces or basements
How Nail-Down Installation Works
The nail-down process follows a specific sequence to ensure a secure, level, and long-lasting floor. Here’s a step-by-step breakdown:
1. Subfloor Preparation
The subfloor must be wood-based—typically plywood (minimum 3/4-inch thick) or oriented strand board (OSB). Concrete slabs cannot accept nail-down flooring without first installing a plywood underlayment. The subfloor must be:
- Clean of debris and dust
- Flat (within 3/16-inch over 10 feet)
- Dry (moisture content below 12% for wood subfloors)
2. Acclimation
Flooring planks must acclimate to the room’s temperature and humidity for 48–72 hours before installation. This prevents warping or gapping after installation.
3. Vapor Barrier
Over crawlspaces or basements, a 6-mil polyethylene vapor barrier is stapled to the subfloor to block moisture from below.
4. First Row Installation
The first row is typically face-nailed (nails driven through the top of the plank) and then covered by baseboard or quarter-round molding. Subsequent rows are blind-nailed through the tongue.
5. Nailing Process
A flooring nailer drives nails or staples at a 45-degree angle through the tongue of each plank. The nailer is struck with a rubber mallet, and the fastener enters the subfloor, pulling the plank tight against the previous row. Nails are spaced 8–12 inches apart along the length of each plank and within 2–3 inches of the ends.
6. Expansion Gaps
A 1/2-inch to 3/4-inch gap is left around the perimeter of the room to allow for natural wood expansion and contraction with humidity changes. This gap is hidden by baseboards.
7. Final Rows
The last few rows may require a pull bar and face-nailing because the nailer cannot fit in tight spaces. These nails are later covered by trim.
Why Nail-Down Matters in Home Improvement
Nail-down installation is not just a technical detail—it directly affects the performance, longevity, and cost of your flooring project. Here’s why homeowners should care:
Durability and Stability
Nail-down floors are extremely stable because each plank is individually fastened. They resist shifting, gapping, and buckling better than floating floors, especially in large rooms or areas with heavy furniture. Solid hardwood installed via nail-down can last 50–100 years with proper maintenance.
Squeak Prevention
Because the flooring is mechanically fastened to the subfloor, nail-down installations are less prone to squeaks compared to floating floors. The nails or staples pull the planks tight, eliminating movement that causes noise.
Repairability
Individual damaged planks can be replaced more easily than with glue-down floors. A nail-down floor allows you to pry up a single plank, cut the nails, and install a new one.
Suitable for Radiant Heat
Some engineered wood floors designed for nail-down can be installed over radiant heating systems (provided the subfloor is wood), offering comfort without compromising stability.
Cost Considerations
- Material cost: Solid hardwood is typically $5–$15 per square foot
- Installation cost: Professional nail-down installation runs $3–$8 per square foot, depending on complexity
- Tool rental: A flooring nailer rents for about $40–$60 per day
- DIY potential: Skilled DIYers can save on labor but must be comfortable with power tools and precise measurements
Nail-Down vs Related Terms
Understanding how nail-down compares to other installation methods helps you choose the right approach for your home.
| Installation Method | Subfloor Required | Best For | Pros | Cons |
|---|---|---|---|---|
| Nail-Down | Wood (plywood/OSB) | Solid hardwood, engineered wood | Permanent, stable, repairable, no glue mess | Requires wood subfloor, not for concrete, labor-intensive |
| Glue-Down | Concrete or wood | Engineered wood, vinyl planks, cork | Works on concrete, thin profile, good for radiant heat | Permanent, difficult to remove, adhesive fumes |
| Floating (Click-Lock) | Any flat surface (concrete, wood, tile) | Laminate, luxury vinyl, engineered wood | DIY-friendly, no adhesive or nails, removable | Can feel hollow, prone to gapping, less stable in large rooms |
| Staple-Down | Wood | Thin engineered wood, some laminates | Faster than nailing, less visible fasteners | Less holding power than nails, not for thick hardwood |
Key takeaway: Nail-down is the gold standard for solid hardwood and engineered wood over wood subfloors. If you have a concrete slab, you must use glue-down or floating methods (or install a plywood subfloor first for nail-down).
When to Use Nail-Down Installation
Nail-down is the right choice for specific scenarios. Use it when:
1. You Have a Wood Subfloor
If your home has a plywood or OSB subfloor (common in houses built after 1950), nail-down is ideal. It provides the strongest mechanical bond.
2. You’re Installing Solid Hardwood
Solid hardwood (3/4-inch thick) must be nailed down. Floating or gluing solid hardwood is not recommended because of expansion and contraction.
3. You Want a Permanent Floor
If you plan to stay in your home for 10+ years and want a floor that won’t shift or squeak, nail-down offers unmatched stability.
4. You Have Heavy Furniture or High Traffic
Nail-down floors resist denting and movement under heavy loads. They’re excellent for living rooms, hallways, and kitchens.
5. You’re Installing Over Radiant Heat (with Engineered Wood)
Some engineered wood products are rated for nail-down over radiant heat systems. Always check the manufacturer’s specifications.
When NOT to Use Nail-Down
- Over concrete slabs (unless you first install a plywood subfloor)
- In basements or below-grade rooms (moisture can cause wood to rot)
- With thin engineered wood (less than 5/16-inch thick may not hold nails)
- If you want a removable floor (nail-down is permanent)
Frequently Asked Questions About Nail-Down Definition Home Improvement
1. Can I install nail-down flooring over concrete?
Not directly. Nail-down requires a wood subfloor. If you have concrete, you must install a plywood underlayment (minimum 3/4-inch) over the concrete, using adhesive and concrete fasteners. This adds cost and raises the floor height. For concrete, glue-down or floating methods are simpler.
2. Do I need special tools for nail-down installation?
Yes. A pneumatic flooring nailer (or stapler) is essential. These tools drive nails at the correct angle and depth. You can rent one from home improvement stores (e.g., Home Depot, Lowe’s) for about $40–$60 per day. You’ll also need a rubber mallet, tape measure, chalk line, and a pull bar for tight spaces.
3. How long does nail-down installation take?
For a 200-square-foot room, a professional can complete nail-down installation in 1–2 days (including subfloor prep and acclimation). DIY installation may take 2–4 days for the same area, depending on experience.
4. Can I remove nail-down flooring later?
Yes, but it’s labor-intensive. Each plank must be pried up, and nails or staples pulled. The subfloor may be damaged and require patching. Nail-down is considered a permanent installation, so removal is not as easy as with floating floors.
5. Does nail-down
Flooring Industry Standards: For official grading standards and installation guidelines, consult the National Wood Flooring Association (NWFA) and the World Floor Covering Association (WFCA). The Family Handyman also offers excellent DIY flooring installation guides.
First time working with vinyl plank and I learned you need the right blade. Used a cheap utility knife and got ragged cuts.
I’ve tried this approach in my own home. Results were good but not miraculous. Solid option for the price point.