
Moisture Barrier Explained: What It Is and Why It Matters
TL;DR: A moisture barrier (also called a vapor barrier) is a sheet of material—usually plastic or foil—that blocks water vapor from moving through walls, floors, or ceilings. It prevents mold, rot, and structural damage by keeping moisture where it belongs (outside or inside, depending on your climate). Without one, your home can suffer from hidden moisture damage that costs thousands to repair.
What Is a Moisture Barrier?
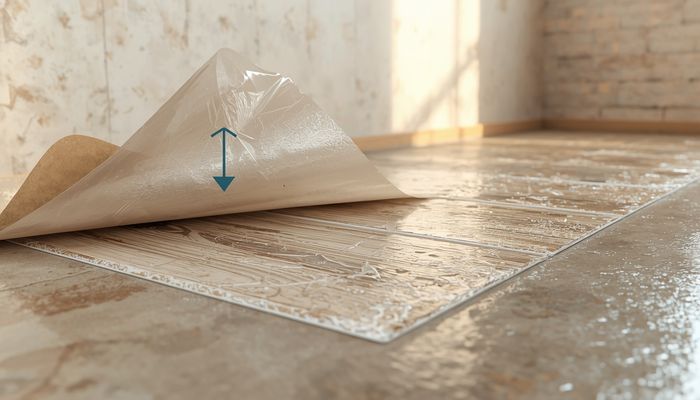
A moisture barrier is a material designed to stop water vapor (invisible moisture in the air) from passing through building assemblies like walls, floors, crawlspaces, or basements. It’s typically made of polyethylene plastic (4-6 mils thick for most residential use), aluminum foil, or specialized vapor-retardant paints.
In home improvement terms, a moisture barrier acts like a raincoat for your house’s structure. It prevents moisture from condensing inside insulation or wood framing, where it can cause rot, mold, and reduced insulation performance.
The key distinction: moisture barriers stop *vapor*, not liquid water. For liquid water (like rain or groundwater), you need a different product called a water-resistant barrier or waterproofing membrane.
How a Moisture Barrier Works
Moisture moves through building materials in two ways: air movement and diffusion. A moisture barrier blocks diffusion—the slow migration of water vapor through materials like drywall, wood, or insulation.
Here’s the science in simple terms:
- Warm air holds more moisture than cold air. When warm, moist air meets a cold surface (like a wall in winter), the moisture condenses into liquid water.
- This condensation happens inside your walls, where you can’t see it. Over time, it soaks into wood, insulation, and drywall, leading to rot and mold.
- A moisture barrier placed on the warm side of the wall prevents that moist air from reaching the cold surface in the first place.
Real-world example: In a cold climate (like Minnesota), a moisture barrier is installed on the interior side of exterior walls (behind the drywall). In winter, warm indoor air is full of moisture from showers, cooking, and breathing. The barrier stops that moisture from reaching the cold exterior sheathing, where it would condense and cause damage.
The barrier’s effectiveness is measured by its perm rating (permeance). Materials with a perm rating of 1 or less are considered vapor barriers. For reference:
- 6-mil polyethylene sheeting: 0.06 perms (excellent barrier)
- Kraft paper facing (on insulation): 0.4 perms (moderate barrier)
- Standard drywall: 50 perms (no barrier at all)
Why a Moisture Barrier Matters in Home Improvement
Skipping or improperly installing a moisture barrier can lead to expensive, hidden problems. Here’s why it matters:
1. Prevents mold and mildew – Mold requires moisture to grow. A moisture barrier keeps wall cavities dry, reducing mold risk by up to 80% in humid climates.
2. Protects structural integrity – Wood framing and sheathing can rot when exposed to trapped moisture. This weakens walls, floors, and roofs over time.
3. Maintains insulation performance – Wet insulation loses its R-value. Fiberglass insulation that gets damp can lose 30-50% of its insulating ability. A moisture barrier keeps insulation dry and effective.
4. Reduces energy costs – Dry insulation works better, meaning your HVAC system doesn’t have to work as hard. This can save 10-15% on heating and cooling bills in some climates.
5. Prevents ice dams – In cold climates, moisture that escapes into attics can freeze and contribute to ice dam formation on roofs.
6. Increases home value – A properly moisture-protected home is less likely to have hidden damage, making it more attractive to buyers and inspectors.
Moisture Barrier vs Related Terms
Homeowners often confuse these terms. Here’s the breakdown:
| Term | What It Blocks | Where It’s Used | Key Difference |
|---|---|---|---|
| Moisture Barrier | Water vapor (invisible) | Inside walls, floors, crawlspaces | Blocks diffusion, not liquid water |
| Vapor Retarder | Same as above, but less restrictive | Same locations | Allows some vapor to pass (perm rating 0.1-1.0) |
| Water-Resistant Barrier | Liquid water (rain, snow) | Under siding, on exterior walls | Keeps bulk water out, but lets vapor through |
| Waterproofing Membrane | Liquid water under pressure | Basement walls, foundations | Stops groundwater from entering |
| House Wrap | Both liquid water and some vapor | Exterior walls under siding | Balances water protection with breathability |
Key takeaway: A moisture barrier is for *vapor control*. If you have a wet basement from groundwater, you need waterproofing, not a vapor barrier.
When to Use a Moisture Barrier
Use a moisture barrier in these specific situations:
In cold climates (USDA zones 4-7): Install on the *interior* (warm side) of exterior walls, behind drywall. This keeps indoor moisture from reaching cold exterior surfaces.
In hot, humid climates (USDA zones 1-3): Install on the *exterior* (warm side) of walls, because moisture comes from outside. This is less common but critical in places like Florida or Texas.
In crawlspaces: Always install a 6-mil polyethylene barrier on the ground (covering the soil) to prevent ground moisture from rising into the crawlspace. This reduces humidity by 50-70%.
In basements: Use a vapor barrier on the interior of foundation walls (behind insulation and framing) if the basement is finished. However, never install a vapor barrier on both sides of a wall—this traps moisture.
Under concrete slabs: A 6-10 mil vapor barrier under concrete prevents ground moisture from wicking up through the slab, which can damage flooring and promote mold.
In attics: Install a vapor barrier on the *warm* side of the attic floor (the ceiling side) to prevent indoor moisture from reaching cold attic air.
When NOT to use one: In mixed climates or with certain wall assemblies (like vapor-permeable insulation), a vapor retarder may be better than a full barrier. Always check local building codes—they often dictate vapor barrier requirements based on your climate zone.
Frequently Asked Questions About Moisture Barriers
Q: Can I use plastic sheeting as a moisture barrier?
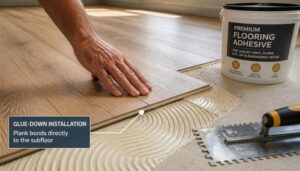
A: Yes, 4-6 mil polyethylene plastic is the most common and affordable moisture barrier. For crawlspaces, use 6 mil or thicker. For walls, 4 mil is usually sufficient, though 6 mil offers better durability.
Q: Do I need a moisture barrier in my basement?
A: It depends. If your basement is finished and you have insulation against the walls, yes—install a vapor barrier on the interior side (behind drywall). If the basement is unfinished and you just want to reduce humidity, a vapor barrier on the floor and lower walls helps, but you may also need a dehumidifier.
Q: What happens if I install it on the wrong side?
A: Installing a vapor barrier on the cold side of a wall can trap moisture inside the wall cavity, causing rot, mold, and insulation failure. This is a common mistake that can lead to thousands in repairs. Always install on the warm side for your climate.
Q: Can I paint over drywall instead of using plastic?
A: Yes, vapor-retardant paint (like certain primers) can act as a moisture barrier. However, it’s less effective than plastic sheeting. Use paint only in low-risk areas (like interior walls) or as a secondary barrier.
Q: How do I check if my home already has a moisture barrier?
A: Look for plastic sheeting behind drywall (in an unfinished area like a basement or attic), or check the insulation facing—kraft paper facing on fiberglass batts acts as a vapor retarder. In crawlspaces, look for plastic on the ground. If you’re unsure, a home inspector can check with a moisture meter.
Now that you understand what a moisture barrier is and why it matters, check our guide on How to Install a Moisture Barrier in a Crawlspace for step-by-step instructions and cost estimates.
Flooring Industry Standards: For official grading standards and installation guidelines, consult the National Wood Flooring Association (NWFA) and the World Floor Covering Association (WFCA). The Family Handyman also offers excellent DIY flooring installation guides.


Thanks for this breakdown. Bookmarked for my upcoming project — exactly what I needed.
Thanks for this breakdown. Bookmarked for my upcoming project — exactly what I needed.