
Feathering Explained: What It Is and Why It Matters
TL;DR Feathering is a technique used in painting, drywall finishing, and woodworking to smoothly blend edges so that transitions are invisible. It involves applying lighter pressure or thinner material at the edges of a patch, coat, or joint, creating a gradual taper that eliminates ridges or sharp lines. Mastering feathering is essential for achieving professional-looking, seamless finishes in home improvement projects.
What Is Feathering in Home Improvement?
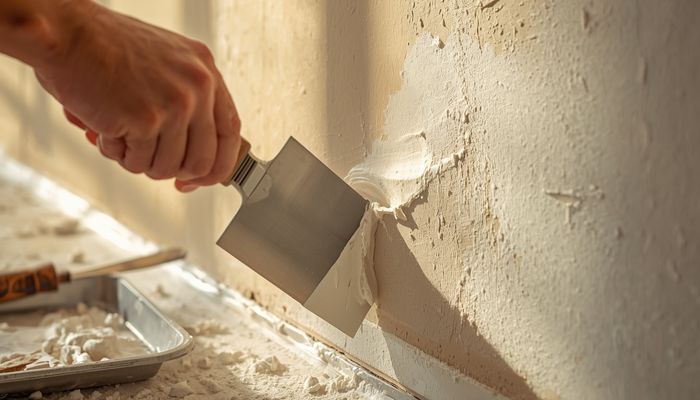
Feathering is the process of gradually thinning out the application of a material—such as paint, joint compound, or wood filler—at its edges so that it blends seamlessly with the surrounding surface. The goal is to create a smooth, invisible transition rather than a visible bump, line, or ridge.
In home improvement, feathering is most commonly used in three contexts:
- Drywall finishing: Feathering joint compound over tape and screw holes to create a flat wall.
- Painting: Feathering paint edges to avoid lap marks (visible lines where wet paint meets dry paint).
- Woodworking: Feathering wood filler or stain to blend repairs with the surrounding grain.
The term comes from the idea of making the edge as thin and soft as a feather, rather than abrupt or sharp.
How Feathering Works
Feathering relies on controlling pressure, angle, and material thickness. Here’s how it works in practice:
In Drywall Finishing
- Apply joint compound over tape or screws using a drywall knife.
2. As you spread the compound, lift the knife slightly at the edges so that the compound tapers from a thick center (about 1/8 inch) to a thin, barely visible edge (less than 1/32 inch).
3. The key is to avoid stopping with a straight edge. Instead, you “feather out” by pulling the knife away from the patch at a shallow angle, leaving a gradual slope.
In Painting
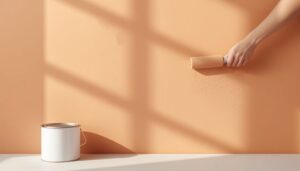
- Load your brush or roller with paint, then apply it to the surface.
2. As you near the end of a stroke, lift the brush or roller slightly so that less paint is deposited at the edge.
3. For large areas, you “feather the edge” by lightly brushing or rolling over the boundary between wet and dry paint, blending them before the paint sets.
In Woodworking
- Apply wood filler to a crack or hole, overfilling slightly.
2. While the filler is still wet, use a putty knife or damp cloth to feather the edges outward, thinning the filler until it matches the surrounding wood surface.
3. After drying, sand the feathered area with fine-grit sandpaper (120-220 grit) to refine the blend.
The physics behind feathering is simple: a gradual slope reflects light evenly, whereas a sharp edge creates a shadow or ridge that the eye detects.
Why Feathering Matters in Home Improvement
Feathering is critical because it directly affects the visual quality and durability of your work. Here’s why it matters:
- Prevents visible seams: In drywall, unfeathered joint compound creates a raised bump that is obvious under paint or texture. Proper feathering ensures the wall looks flat and smooth.
- Eliminates lap marks: In painting, failing to feather edges results in darker or thicker lines where fresh paint overlaps dry paint. This is especially noticeable on ceilings or large walls.
- Improves adhesion: A feathered edge has a larger surface area for bonding, reducing the risk of peeling or cracking over time.
- Saves time and materials: Feathering avoids the need for excessive sanding or additional coats. A well-feathered joint often requires only one light sanding and one final coat.
- Professional appearance: Whether you’re a DIYer or a pro, feathering separates amateur work from skilled finishes. It’s the difference between a patch that “disappears” and one that screams “look at me.”
Real-world example: If you’re patching a 2-inch hole in drywall, failing to feather the joint compound 6–8 inches beyond the hole will leave a visible bump. Feathering out to a 12-inch diameter makes the repair invisible after painting.
Feathering vs Related Terms
Feathering is often confused with other finishing techniques. Here’s how it compares:
| Term | Definition | Key Difference from Feathering |
|---|---|---|
| Feathering | Gradual thinning of material at edges to create a smooth blend | Focuses on the *edge* transition |
| Sanding | Abrasively smoothing a surface after material has dried | Happens *after* feathering; feathering reduces the need for heavy sanding |
| Taping | Applying tape over drywall joints before compound | A separate step; feathering is done *over* the tape |
| Blending | Mixing colors or textures to create a uniform appearance | Broader term; feathering is a specific method for achieving blend |
| Flattening | Making a surface level or flat | Feathering creates a slope, not necessarily flatness |
Key takeaway: Feathering is a technique, not a material. You can feather joint compound, paint, filler, or even caulk. Sanding and taping are related but distinct steps in a process.
When to Use Feathering
Use feathering whenever you need a smooth, invisible transition between a repair or new material and the existing surface. Specific situations include:
- Drywall repairs: After patching holes, cracks, or dents. Feather compound 6–12 inches beyond the repair for best results.
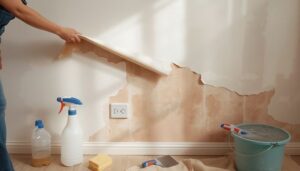
- Painting touch-ups: When repainting a small area (e.g., after removing a nail). Feather the new paint into the old to avoid a patchy look.
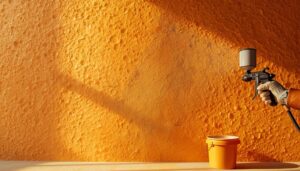
- Ceiling texture matching: When repairing textured ceilings, feather the new texture compound to blend with existing patterns.
- Wood filler application: For filling nail holes, cracks, or gouges in trim, furniture, or flooring.
- Caulking: When applying caulk along baseboards or countertops, feather the edge with a wet finger or tool to create a smooth, clean line.
- Staining or varnishing: When blending a new stain into an existing finish on wood.
When NOT to use feathering: If you’re applying a thick, structural layer (e.g., leveling a floor), feathering is not appropriate—you want a uniform thickness. Also, avoid feathering on surfaces that will receive a heavy texture (like knockdown), as the texture will hide edges anyway.
Frequently Asked Questions About Feathering
1. Do I need to feather every coat of joint compound?
No. Only the final coat needs careful feathering. The first coat (over tape) should be thin and feathered slightly, but the second coat is where you focus on creating a wide, smooth taper. The third coat (if needed) is a thin skim coat that you feather out to blend.
2. Can I feather paint with a roller?
Yes. Use a low-nap roller (3/8 inch or less) and lightly “tip off” the edge by rolling with very light pressure at the boundary. For best results, work in small sections and keep a wet edge—don’t let paint dry before feathering.
3. How wide should I feather drywall compound?
For a typical patch (e.g., a 2-inch hole), feather the compound at least 6 inches beyond the patch in all directions. For larger repairs (e.g., a 12-inch crack), feather 12–18 inches out. The wider the feather, the less visible the repair.
4. What grit sandpaper should I use after feathering?
Use 120-grit for initial sanding of dried compound, then switch to 150- or 180-grit for a smooth finish. Sand lightly—the goal is to remove ridges, not to sand through the feathered edge.
5. Is feathering the same as “blending” in painting?
Not exactly. Blending is a broader term that includes feathering but also involves mixing colors or using techniques like wet-on-wet application. Feathering specifically refers to the physical thinning of material at the edge.
Now that you understand feathering, check our guide on how to patch drywall like a pro for step-by-step instructions on applying this technique to your next repair project.
Professional Resources: For expert wall finishing and painting guides, visit This Old House Painting and Family Handyman Painting. For paint product specifications, see Sherwin-Williams and Benjamin Moore.
Exactly the kind of practical info homeowners need. Clear, concise, and actionable.
I’ve tried this approach in my own home. Results were good but not miraculous. Solid option for the price point.