
Underlayment Explained Simply: What It Is and Why It Matters
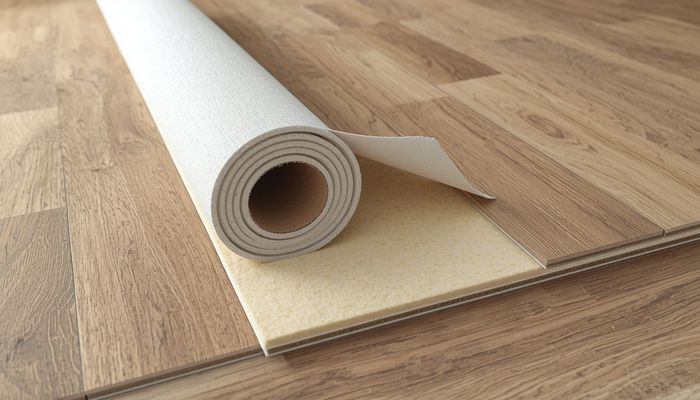
TL;DR: Underlayment is a thin layer of material installed between your subfloor (or roof deck) and the finished flooring or roofing. It provides moisture protection, soundproofing, and a smoother surface for installation. Without it, your floors may creak, warp, or fail prematurely.
What Is Underlayment?
Underlayment is a protective barrier installed beneath the visible surface of your floor or roof. Think of it as the unsung hero of home construction—it’s not visible once the project is done, but it plays a critical role in durability, comfort, and performance.
For flooring, underlayment sits between the subfloor (usually plywood or concrete) and the finished floor material (like hardwood, laminate, or tile). For roofing, it’s installed directly over the roof deck, under the shingles or other roofing material.
Common materials include:
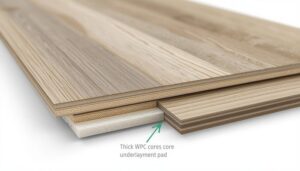
- Foam (often used under laminate or engineered wood)
- Cork (natural, good for soundproofing)
- Rubber (durable, excellent for moisture control)
- Felt or synthetic felt (for roofing underlayment)
- Plywood or cement board (for tile or hardwood)
How Underlayment Works
Underlayment performs several key functions, depending on where it’s used:
For floors:
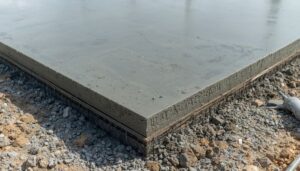
- Moisture barrier: Prevents moisture from the subfloor (especially concrete slabs) from seeping into your finished floor, which can cause warping or mold.
- Sound dampening: Reduces noise transfer between floors—critical in multi-story homes or apartments.
- Smoothing surface: Fills minor imperfections in the subfloor, preventing bumps, dips, or creaks in the finished floor.
- Thermal insulation: Adds a thin layer of insulation, making floors feel warmer underfoot.
For roofs:
- Waterproofing: Acts as a secondary barrier if shingles blow off or ice dams form.
- Protection during installation: Keeps the roof deck dry if rain delays shingle installation.
- Vapor control: Helps prevent condensation buildup in the attic.
Why Underlayment Matters in Home Improvement
Skipping underlayment is one of the most common mistakes DIY homeowners make—and it often leads to expensive repairs later. Here’s why it matters:
- Prevents costly damage: A concrete subfloor without underlayment can wick moisture into your laminate or hardwood, causing it to buckle or rot within 2–3 years.
2. Improves comfort: Underlayment reduces noise by up to 50% in some cases (e.g., cork underlayment for soundproofing).
3. Extends lifespan: Proper underlayment can double the life of your flooring by reducing wear from subfloor movement.
4. Warranty requirement: Many flooring manufacturers require specific underlayment to keep your warranty valid. Ignoring this can void your coverage.
For example, if you install luxury vinyl plank (LVP) over a concrete slab without a vapor-barrier underlayment, moisture can cause the planks to separate or discolor within months.
Underlayment vs Related Terms
| Term | What It Is | How It Differs |
|---|---|---|
| Subfloor | The structural base (plywood, OSB, or concrete) that supports the floor. | Underlayment goes *on top* of the subfloor. The subfloor is structural; underlayment is functional. |
| Vapor barrier | A plastic or foil sheet that blocks moisture. | Underlayment often *includes* a vapor barrier, but not all underlayment does. |
| Padding | Soft foam or fiber used under carpets. | Padding is thicker and softer, while underlayment is thinner and more rigid (for hard flooring). |
| Roofing felt | Asphalt-saturated paper used under shingles. | This is a *type* of underlayment. Modern synthetic underlayment is lighter and more durable. |
## When to Use Underlayment
Always use underlayment when:
- Installing laminate, engineered wood, or LVP over concrete (moisture barrier is essential).
- Installing hardwood over a wooden subfloor (to reduce squeaks and provide a smooth surface).
- Replacing a roof (building codes require it in most areas).
- Adding soundproofing between floors (use cork or rubber underlayment).
You may skip underlayment when:
- Installing solid hardwood over a wooden subfloor with a nail-down method (the wood itself provides stability).
- Using a “floating” floor system that comes with pre-attached underlayment (rare, but check the product).
- Installing carpet over a padded subfloor (but you still need a separate pad).
Pro tip: Always check the flooring manufacturer’s instructions. Some require underlayment with a specific R-value or vapor permeability.
Frequently Asked Questions About Underlayment
Q: Can I use carpet padding as underlayment for laminate?
A: No. Carpet padding is too soft and will cause laminate planks to flex and break. Use a dedicated laminate underlayment (usually foam or cork).
Q: How thick should underlayment be?
A: For most flooring, 1/8 to 1/4 inch (3–6 mm) is standard. Thicker underlayment (up to 1/2 inch) is used for soundproofing, but can cause instability with some floors.
Q: Do I need underlayment for tile?
A: Yes, but it’s different. For tile, use cement board or uncoupling membrane (like Ditra) to prevent cracks from subfloor movement.
Q: Can underlayment help with cold floors?
A: Yes. Foam or cork underlayment adds a thin layer of insulation. For significant cold, add a dedicated radiant heat system, but underlayment still helps.
Q: Is underlayment waterproof?
A: Not all. Some are water-resistant, but only vapor-barrier underlayment is waterproof. Check the product label for “vapor barrier” rating.
Q: How much does underlayment cost?
A: Expect /bin/sh.50–.00 per square foot for standard foam or felt. Premium cork or rubber can cost – per square foot.
Now that you understand underlayment, check our guide on How to Choose the Right Flooring Underlayment for Your Home to pick the perfect product for your next project.
Flooring Industry Standards: For official grading standards and installation guidelines, consult the National Wood Flooring Association (NWFA) and the World Floor Covering Association (WFCA). The Family Handyman also offers excellent DIY flooring installation guides.
🏠 Flooring project? Browse top-rated flooring tools on Amazon to get the job done right.
Tools & Materials You’ll Need for Underlayment Installation
Before you start, having the right gear on hand saves trips to the hardware store and keeps the job moving. Here’s a practical list for a typical flooring underlayment project (say, installing under laminate or engineered hardwood in a 200-square-foot room):
- Underlayment material – Choose foam (6mm or 2mm rolls), cork (2-3mm sheets), or rubber (2mm rolls). For a 200 sq. ft. room, buy 10% extra to account for cuts and waste.
- Utility knife with extra blades – A sharp blade is essential for clean, straight cuts through foam or cork. Dull blades tear the material, causing gaps.
- Measuring tape (25-foot minimum) – For accurate room dimensions and cutting lengths.
- Straightedge or T-square – Guides your knife for straight cuts along walls and corners.
- Seam tape (adhesive, 2-3 inches wide) – Used to seal joints between underlayment rolls so moisture can’t sneak through. Expect to use about 50 feet for a typical room.
- Stapler or construction adhesive – A staple gun (with 1/4-inch staples) helps tack underlayment to wood subfloors. For concrete, use adhesive spray or double-sided tape.
- Knee pads – You’ll be on your hands and knees for 1–3 hours (depending on room size). Knee pads are a game-changer.
- Broom and shop vacuum – The subfloor must be spotless. Dust and debris create bumps that telegraph through the finished floor.
- Moisture meter (optional but recommended) – Tests concrete subfloors for moisture content. Ideal is below 4% for concrete; above that, use a vapor barrier underlayment.
Time estimate: For a 200 sq. ft. room, expect 1.5 to 3 hours for underlayment installation, depending on how many cuts and obstacles (doorways, vents) you have.
Common Mistakes to Avoid When Installing Underlayment
Even experienced DIYers slip up here. Avoiding these five pitfalls will save you from pulling up your floor later.
- Skipping the subfloor prep. Laying underlayment over a dirty, damp, or uneven subfloor is the #1 mistake. Sweep, vacuum, and check for high spots (use a 4-foot level). Fill low spots with leveling compound—this adds 24–48 hours drying time but is worth it. Uneven spots as small as 1/8 inch can cause laminate planks to separate.
- Using the wrong underlayment thickness. For laminate, 2mm foam is standard; thicker (6mm) can make planks flex and break at the joints. For engineered hardwood, 2–3mm cork or rubber works best. Always check the flooring manufacturer’s spec—some require underlayment with an attached vapor barrier.
- Overlapping seams. Underlayment rolls should butt together, not overlap. Overlaps create ridges that show through the finished floor. Use seam tape to seal the gap, not to cover a ridge.
- Forgetting the vapor barrier on concrete. Concrete slabs wick moisture year-round. If your underlayment doesn’t have a built-in vapor barrier, lay 6-mil polyethylene sheeting first. Without it, moisture can cause mold and floor buckling within 12–18 months.
- Rushing the acclimation process. Underlayment and flooring need to sit in the room for 48–72 hours before installation to adjust to temperature and humidity. Skipping this can cause expansion or contraction gaps later.
How to Choose the Right Underlayment for Your Project
Not all underlayment is created equal. Your choice depends on the subfloor type, the finished floor material, and your priorities (soundproofing vs. moisture control vs. cost). Here’s a breakdown to help you decide.
For laminate flooring: Stick with 2mm foam underlayment with a built-in vapor barrier. It’s affordable (around $0.30–$0.50 per square foot) and provides adequate cushioning and moisture protection. If you’re in a basement or over a concrete slab, double-check that the vapor barrier is included—otherwise, add a separate 6-mil poly sheet.
For engineered hardwood or luxury vinyl plank (LVP): Cork or rubber underlayment at 2–3mm thickness is ideal. Cork is natural, resists mold, and reduces noise by up to 50% (measured in decibel reduction). Rubber offers superior moisture resistance and durability. Expect to pay $0.60–$1.20 per square foot. Avoid foam for these materials—it’s too soft and can cause clicking or shifting over time.
For tile or stone: You’ll need cement backer board (1/4-inch or 1/2-inch thick) as underlayment, not foam or cork. This provides a rigid, waterproof base that prevents tile cracking. Install with thin-set mortar and mesh tape at seams—allow 24 hours curing before tiling.
For roofing: Synthetic felt underlayment (30 lb. or 40 lb. weight) is the modern standard. It’s lighter, more tear-resistant, and lasts longer than traditional asphalt-saturated felt. One roll covers about 1,000 square feet. For low-slope roofs, use self-adhering rubberized underlayment (ice and water shield) along eaves and valleys—this adds $0.50–$1.00 per square foot but prevents ice dam damage.
Soundproofing priority: If you’re in a condo or upstairs bedroom, choose cork or rubber underlayment with an STC (Sound Transmission Class) rating of 50 or higher. Foam typically rates lower (STC 45–48). For comparison, a 20% increase in STC rating roughly halves perceived noise.
Step-by-Step Installation Tips for Flooring Underlayment
Once you’ve chosen your material, follow these practical steps for a smooth install. This assumes you’re working on a clean,
Does this work well in humid climates? I’m in the South and moisture is always a concern.
Used luxury vinyl in three flips last year. Quick to install and instantly makes a house look updated.