
Knockdown Texture Explained: What It Is and Why It Matters
TL;DR: Knockdown texture is a popular drywall finish that creates a subtle, orange-peel-like texture on walls and ceilings. It’s achieved by spraying joint compound onto the surface, then “knocking down” the peaks with a drywall knife to create a flat, stucco-like pattern. This finish hides imperfections better than smooth walls and adds a warm, Mediterranean look to any room.
What Is Knockdown Texture?
Knockdown texture is a drywall finishing technique that produces a mottled, slightly textured surface. Think of it as a cross between a smooth wall and a heavy orange-peel finish. The final look is a series of flattened bumps that create a soft, irregular pattern resembling stucco or leather.
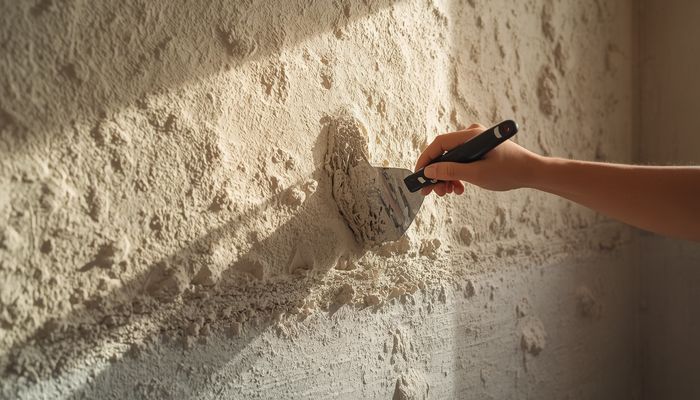
The term “knockdown” refers to the second step in the process: after spraying the texture material onto the wall, you wait for it to partially dry, then “knock down” the raised peaks with a wide drywall knife. This flattens the texture into a low-profile pattern that’s still visible but not rough to the touch.
Knockdown texture is most commonly used on ceilings and accent walls in living rooms, dining rooms, and bedrooms. It’s also popular in Mediterranean, Southwestern, and modern farmhouse-style homes.
How Knockdown Texture Works
Creating knockdown texture involves a specific sequence of steps. Here’s how it’s typically done:
- Prepare the surface. The drywall must be taped, mudded, and sanded smooth before texturing begins. Any existing texture should be removed or primed over.
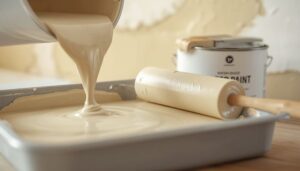
2. Mix the texture material. Joint compound (drywall mud) is thinned with water to a creamy consistency, similar to pancake batter. Some pros add a small amount of texture additive to improve adhesion and consistency.
3. Spray the texture. Using a hopper gun connected to an air compressor, the thinned mud is sprayed onto the surface in a random pattern. The gun creates a fine mist that lands in small peaks and valleys.
4. Let it set. The texture needs to dry for about 10–20 minutes, depending on temperature and humidity. You want it to lose its wet sheen but still be tacky—not fully dry.
5. Knock it down. A wide drywall knife (12–14 inches) is held at a shallow angle and dragged across the surface in long, even strokes. This flattens the peaks, leaving a smooth, irregular pattern.
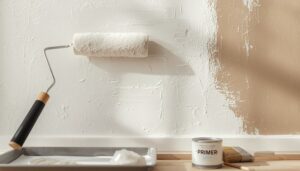
6. Prime and paint. After the texture dries completely (usually 24 hours), it must be primed before painting. Unprimed texture absorbs paint unevenly, creating a blotchy appearance.
The entire process requires practice. Too early, and the texture smears. Too late, and the peaks break off rather than flatten. Professional finishers often achieve a consistent pattern within one or two passes, but DIYers may need several attempts.
Why Knockdown Texture Matters in Home Improvement
Knockdown texture isn’t just a cosmetic choice—it serves several practical purposes in home improvement:
Hides imperfections. Smooth walls show every dent, nail pop, and drywall seam. Knockdown texture masks minor flaws, making it ideal for older homes with uneven walls or ceilings.
Reduces echo. The subtle texture breaks up sound waves, reducing echo in large rooms. This is especially useful for living rooms, home theaters, or open-concept spaces.
Adds visual interest. A knockdown finish gives walls a warm, handcrafted feel that flat paint can’t match. It works well in rooms where you want a touch of character without going full-on rustic.
Increases durability. The texture layer adds a slight thickness to the wall surface, making it more resistant to minor dents and scratches. This is helpful in high-traffic areas like hallways and entryways.
Improves paint adhesion. Textured surfaces hold paint better than smooth ones, reducing the chance of peeling or bubbling over time.
Cost-effective upgrade. Adding knockdown texture to a room costs about $1–$3 per square foot (materials and labor), compared to $3–$5 per square foot for a smooth finish. It’s a budget-friendly way to upgrade a room’s appearance.
Knockdown Texture vs Related Terms
Homeowners often confuse knockdown texture with similar finishes. Here’s how they compare:
| Term | Appearance | Application Method | Texture Depth |
|---|---|---|---|
| Knockdown | Flattened stucco-like pattern | Spray then knock down | Low to medium |
| Orange Peel | Fine, bumpy surface like citrus peel | Spray only (no knockdown) | Very low |
| Skip Trowel | Irregular, hand-applied swirls | Troweled on by hand | Medium to high |
| Popcorn Texture | Heavy, bumpy ceiling finish | Spray with large particles | High |
| Smooth Finish | Flat, seamless surface | Hand-troweled or sprayed | None |
Key differences:
- Orange peel is sprayed and left alone—no knockdown step. It’s smoother than knockdown but still hides minor flaws.
- Skip trowel is applied with a trowel in sweeping arcs, creating a more organic, artisan look. It requires more skill and costs more.
- Popcorn texture uses large, Styrofoam-like particles and is almost exclusively used on ceilings. It’s dated and hard to repair.
Knockdown strikes a balance between texture and smoothness, making it a versatile choice for most rooms.
When to Use Knockdown Texture
Knockdown texture works best in specific scenarios:
On ceilings. It’s the most common ceiling finish in new construction (after smooth). It hides drywall seams and nail pops better than orange peel, and it’s easier to repair than popcorn.
In living rooms and dining rooms. These spaces benefit from the warm, inviting look of knockdown texture. It pairs well with crown molding and wainscoting.
In bedrooms. A knockdown ceiling creates a cozy, quiet atmosphere. The texture reduces echo, which is helpful in master bedrooms with high ceilings.
In rental properties. Landlords often choose knockdown because it’s durable, easy to touch up, and hides wear and tear.
Avoid knockdown in:
- Bathrooms and kitchens. High humidity can cause texture to soften or peel. Smooth walls or tile are better choices.
- Modern minimalist homes. If you want a sleek, contemporary look, knockdown texture can feel dated.
- Small rooms with low ceilings. Too much texture can make a space feel smaller. Stick with orange peel or smooth finish.
Frequently Asked Questions About Knockdown Texture
1. Can I apply knockdown texture myself?
Yes, but it requires practice. You’ll need a hopper gun, air compressor, joint compound, and a wide drywall knife. Expect a learning curve—most DIYers get acceptable results after one or two practice panels.
2. How long does knockdown texture take to dry?
The texture should be knocked down within 10–20 minutes of spraying. Full drying takes 24 hours before priming and painting.
3. Can knockdown texture be repaired?
Yes. Small cracks or chips can be filled with spackle and sanded smooth. For larger areas, you may need to re-texture the entire wall or ceiling to match the pattern.
4. Is knockdown texture outdated?
Not necessarily. It remains popular in Southwestern, Mediterranean, and modern farmhouse designs. However, smooth walls are trending in contemporary and minimalist homes.
5. How much does knockdown texture cost?
Professional installation runs $1–$3 per square foot. DIY costs about $0.50–$1 per square foot for materials (mud, primer, paint, and rental equipment).
Now that you understand knockdown texture, check our guide on [how to choose the right drywall finish for your home] to compare all your options before starting your next project.
Professional Resources: For expert wall finishing and painting guides, visit This Old House Painting and Family Handyman Painting. For paint product specifications, see Sherwin-Williams and Benjamin Moore.
Does this work well in humid climates? I’m in the South and moisture is always a concern.
For flips, fresh paint is the cheapest way to add value. We budget for it on every project.