
Oil-Based Paint Explained Simply: What It Is and Why It Matters
TL;DR: Oil-based paint uses natural or synthetic oil as the binder that holds pigment together. It creates a hard, glass-smooth finish that resists stains, moisture, and scratches far better than water-based latex — but it dries slowly, has a strong odor, and requires mineral spirits for cleanup. Homeowners love it for trim, doors, cabinets, and metal surfaces where durability and a flawless look matter most.
What Is Oil-Based Paint?
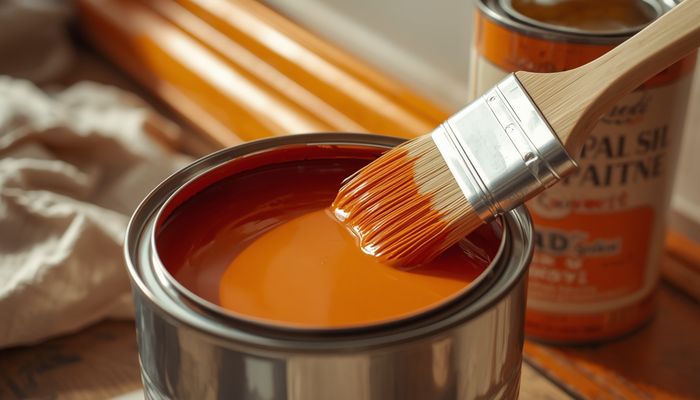
Oil-based paint is a type of coating where the primary liquid that carries the pigment and binds it to a surface is a natural oil (like linseed oil) or a synthetic oil resin (alkyd). When the liquid evaporates and the oil reacts with oxygen, it hardens into a tough, protective film. Unlike water-based latex paints that dry by water evaporation, oil-based paint undergoes a chemical curing process called oxidation. This is what gives it that legendary hard finish that can take a beating in high-traffic areas.
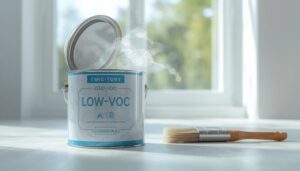
The two main kinds you’ll see at the hardware store are traditional oil-based paints (often simply labeled “oil paint”) and alkyd paints — a modern, synthetic version that behaves nearly identically but has slightly lower VOCs and a more consistent drying time. Most “oil-based” paints sold to homeowners today are actually alkyd-based. They still clean up with paint thinner or mineral spirits, not soap and water, so they’re still treated as oil paints in every practical way.
How Oil-Based Paint Works
Think of oil-based paint as a liquid plastic that hardens from the outside in. When you brush or roll it on, the solvent (mineral spirits or similar) starts evaporating, leaving behind the oil binder and pigment. Over the next few hours, the oil molecules react with oxygen in the air — a process called crosslinking — to form a continuous, solid film. This is not just drying; it’s curing. That’s why you can’t speed it up with just a fan, and why a freshly painted door might feel dry to the touch in 6–8 hours but won’t be fully hard for up to a week.
During that curing window, the paint levels itself beautifully. Because it dries slowly, brush strokes have time to flatten out, creating the glassy, mirror-like surface that oil paint is famous for. A typical gallon covers 350–400 square feet per coat on smooth surfaces, but you often need only one coat coverage for trim — that’s partly because the paint hides brush marks and goes on thick. The finished film is about 2–3 mils thick when dry, which is roughly the thickness of a trash bag, and it resists chips, scuffs, and household cleaners without dulling.
Why Oil-Based Paint Matters in Home Improvement
For the right project, oil-based paint solves problems that water-based latex simply can’t. Here’s why it still matters in a world full of water-based options:
Durability you can scrub. Once fully cured, an oil-based finish stands up to frequent cleaning, door slams, and everyday abuse without peeling or wearing down to the previous color. That’s why it’s the go-to for baseboards, handrails, and kitchen cabinets that get fingerprints and grease splatters.
Superior adhesion. Oil paint grabs onto glossy surfaces and previously painted oil-based layers without a separate primer — something latex struggles with. If you’re repainting an old house with trim that’s already oil-based, sticking with oil means you don’t have to sand down to bare wood.
Moisture and rust resistance. The tight, non-porous film keeps moisture out of metal and wood. For outdoor metal railings, radiators, or bathroom trim, oil paint protects against rust and water damage better than many acrylics. It also blocks stubborn stains like tannin bleed from cedar or nicotine from walls — a single coat of oil-based primer sealer locks those stains away.
A furniture-grade finish. If you’re painting wood cabinets or an interior door, oil paint levels out so well that the final result looks sprayed, even if you used a brush. It gives that buttery, antique-furniture look that’s hard to replicate with water-based paints unless you’re a pro.
Oil-Based Paint vs Related Terms
Homeowners often hear oil paint lumped in with other products. Here’s how to tell them apart:
Oil-based paint vs. latex (water-based) paint. Latex uses acrylic or vinyl binders suspended in water; it cleans up with soap and water, dries in 1–2 hours, and has low odor. Oil-based needs mineral spirits for cleanup, takes 6–8 hours to dry to touch, and has a strong smell. Oil wins on leveling and hardness; latex wins on convenience, color retention, and resistance to yellowing over time.
Oil-based paint vs. alkyd paint. Alkyd is simply a synthetic oil — most “oil” paints sold today are alkyds. They perform identically, but alkyds often have a slightly shorter recoat window and fewer VOCs. For practical purposes, you treat them the same: mineral spirit cleanup, long cure, hard finish.
Oil-based paint vs. enamel. Enamel isn’t a type of binder; it’s a description of the finish — hard, glossy, and durable. Both oil-based and water-based paints can be labeled “enamel.” When a can says “oil-based enamel,” it means an oil/alkyd paint formulated to cure especially hard, making it ideal for doors and trim. So, all oil-based enamels are oil paints, but not all oil paints are labeled enamel.
Oil-based paint vs. varnish/polyurethane. Varnish and polyurethane are clear protective finishes (no pigment) used over stained wood. Paint provides color and opacity. You’d use an oil-based paint to change a wood surface’s color completely while still getting the tough oil protection — a stain plus varnish gives a transparent wood look, but an oil paint covers it entirely.
When to Use Oil-Based Paint
Choosing oil-based paint is a trade-off: you get incredible toughness and a smooth finish, but you deal with fumes, long dry times, and tricky cleanup. That makes it perfect for certain projects and not others.
Best uses:
- Interior trim, baseboards, and crown molding — stays white and crisp (if you
Professional Resources: For expert wall finishing and painting guides, visit This Old House Painting and Family Handyman Painting. For paint product specifications, see Sherwin-Williams and Benjamin Moore.
🎨 Get the best results — Shop premium paint and supplies on Amazon for professional-quality finishes.
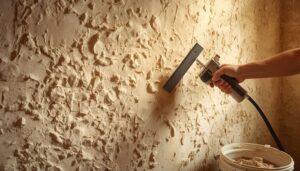
Tools & Materials You’ll Need for Oil-Based Paint Projects
Working with oil-based paint requires a different set of tools than latex. Because cleanup requires mineral spirits or paint thinner, and the paint itself is thicker and slower-drying, you’ll want to invest in the right gear from the start. Here’s what I keep on hand for any oil-based paint job:
- Natural-bristle brushes – Look for china-bristle brushes (often labeled “oil paint” or “natural bristle”). Synthetic bristles can swell and go limp in oil-based paint, leaving a mess. A 2-inch angled sash brush for trim and a 3-inch flat brush for doors are my go-tos.
- High-density foam rollers (¼-inch nap) – For smooth surfaces like cabinets or doors, foam rollers leave a flawless finish with minimal stipple. Avoid standard nap rollers—they trap too much paint and create texture.
- Mineral spirits or paint thinner – You’ll need this for cleanup, thinning paint if it’s too thick, and priming your brush before starting. A quart is usually enough for a single door or window trim project.
- Solvent-safe paint tray or metal tray liner – Plastic tray liners can dissolve in mineral spirits. Use a metal tray or a heavy-duty plastic tray rated for solvents.
- Nitrile or chemical-resistant gloves – Latex gloves break down quickly in mineral spirits. Nitrile holds up much better and keeps the paint off your hands.
- Drop cloths (canvas or heavy plastic) – Oil-based paint drips are stubborn and can eat through lightweight plastic. Canvas drop cloths are safer on floors and won’t slide around.
- Paint can opener and stir sticks – Oil paint often separates in the can. Stir thoroughly for at least 2–3 minutes before use.
- Rags or shop towels (cotton, not synthetic) – For wiping up spills and cleaning brushes. Dispose of oil-soaked rags properly—they can spontaneously combust. Lay them flat to dry or store in a sealed metal container.
- Sandpaper (120- and 220-grit) – You’ll need 120-grit for initial sanding and 220-grit for between coats. A sanding block helps keep edges flat.
- Tack cloth – After sanding, wipe away all dust with a tack cloth. Any leftover dust will show through that glossy finish.
- Primer (oil-based or shellac-based) – For bare wood or surfaces you’re switching from latex to oil, use an oil-based or shellac primer like Zinsser BIN. Water-based primer under oil paint can peel.
Step-by-Step Application Guide for Trim and Doors
Getting that glass-smooth finish with oil-based paint isn’t complicated, but it does require patience and a specific order of work. Here’s how I approach a typical interior door or baseboard project:
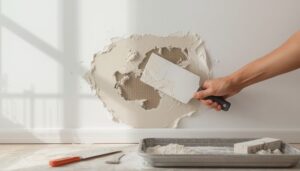
Step 1: Prep the surface (allow 1–2 hours). Sand with 120-grit sandpaper to knock down any gloss or rough spots. Wipe clean with a tack cloth. Fill any nail holes or dents with wood filler and sand smooth after drying. For bare wood, apply one coat of oil-based primer and let it cure for 24 hours before painting.
Step 2: Set up your workspace. Lay down drop cloths, open windows for ventilation (a box fan blowing outward helps), and pour about 1–2 inches of mineral spirits into a small jar for brush cleaning. Stir your paint thoroughly for 3 minutes—don’t skip this, or you’ll get inconsistent sheen.
Step 3: “Tip off” your brush. Dip your brush about 1/3 of the way into the paint, then tap off the excess against the inside of the can. You want the brush loaded but not dripping. For vertical surfaces like door edges, work from the top down to avoid drips.
Step 4: Apply in thin, even coats. Oil-based paint self-levels, so you don’t need to pile it on. Brush on a coat about 3–4 inches wide, then use long, smooth strokes to even it out. On flat surfaces like door panels, finish each section with a light “tip-off” stroke—barely touching the surface with the tip of the brush—to eliminate brush marks. Work in sections, keeping a wet edge to avoid lap marks.
Step 5: Wait for tack-free drying (6–8 hours). The paint will feel dry to the touch but isn’t fully cured. Don’t close doors or windows fully during this time—sticking can ruin the finish. For a second coat, wait at least 16–24 hours. For cabinets or high-wear surfaces, wait 48–72 hours before light use, and a full 7 days before heavy use or cleaning.
Step 6: Clean up immediately. Rinse brushes in mineral spirits, working the solvent through the bristles, then wash with warm soapy water to remove residual oil. Hang brushes to dry bristle-down. Dispose of used mineral spirits by letting solids settle, then pouring off the clear liquid for reuse—or take it to a hazardous waste facility.
Common Mistakes to Avoid with Oil-Based Paint
Even experienced DIYers make these slip-ups. Here are the ones I see most often, along with how to avoid them:
- Using latex brushes or rollers. Synthetic bristles can swell and leave streaks. Always use natural-bristle brushes and foam rollers for oil-based paint. The difference is night and day.
- Skipping primer on bare wood or glossy surfaces. Oil-based paint needs a good mechanical bond. Without primer, it can peel or bubble, especially on bare pine or previously painted glossy trim. Use an oil-based or shellac primer—never a water-based one under oil paint.
- Applying too thick a coat. Thick coats look great at first but can sag, drip, or take weeks to fully cure. Thin coats (about 3–4 mils wet) self-level beautifully and cure properly. If you’re seeing drips, you’re laying it on too heavy.
- Recoating too soon. Oil-based paint cures
Really helpful article. I’ve been researching this for weeks and this put everything together clearly.
A fresh coat of paint in neutral tones sells houses faster than any other single improvement.