
I still remember the itch. Not the mild, “maybe I should scratch that” kind — the full-body, what-have-I-done-to-myself, standing-in-a-cold-shower-at-2-AM kind. I’d spent eight hours crawling through my 1950s attic in July, wrestling pink batts between joists while sweat dripped into my eyes. I wore a t-shirt and jeans. No mask. No gloves. I was twenty-three and invincible.
I paid for that arrogance for three days. Fiberglass slivers embedded in my forearms. A cough that tasted like insulation. My wife refused to sleep in the same bed because tiny glass particles had apparently migrated everywhere.
That was fifteen years and four houses ago. I’ve since insulated two attics, three basement rim-joist assemblies, and one garage conversion. I’ve made every mistake you can make with fiberglass. Here’s what I wish someone had told me before the first roll.
What You’re Actually Working With
Fiberglass insulation isn’t complicated. It’s molten glass spun into hair-thin fibers, held together with a binder, and formed into batts or left loose for blowing. Owens Corning owns the color pink — literally trademarked — and their R-30 batts are what you’ll find stacked floor-to-ceiling at every Home Depot in America. CertainTeed makes good product too, usually in white or yellow. The stuff works by trapping air. That’s it. Air doesn’t conduct heat well, and millions of tiny glass pockets trap millions of tiny air bubbles. Physics does the rest.
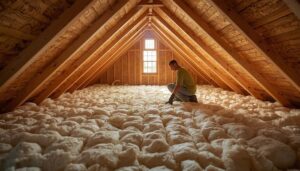
Batts come pre-cut to fit standard framing. You’ll see 15-inch widths for 16-inch on-center studs and 23-inch for 24-inch. Rolls are the same stuff but uncut, which is cheaper per square foot but means more time with the utility knife. Loose-fill is what the pros blow into attics with a machine that looks like a wood chipper had a baby with a vacuum cleaner.
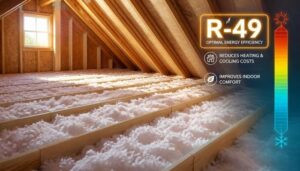
R-value is the number everyone obsesses over. R-13 fits in a 2×4 wall cavity. R-19 fills a 2×6. R-30 through R-60 goes in attics depending on your climate zone. Higher numbers mean more resistance to heat flow. Simple. Until you install it wrong and none of those numbers matter.
The Mistakes That Undo Everything
Here’s the thing about fiberglass that the packaging won’t tell you: it works beautifully in laboratory conditions and terribly in the real world if you rush. I’ve walked into attics where homeowners spent two thousand dollars on R-38 batts and got maybe R-20 worth of performance because they shoved the insulation into every cavity like they were stuffing a Thanksgiving turkey.
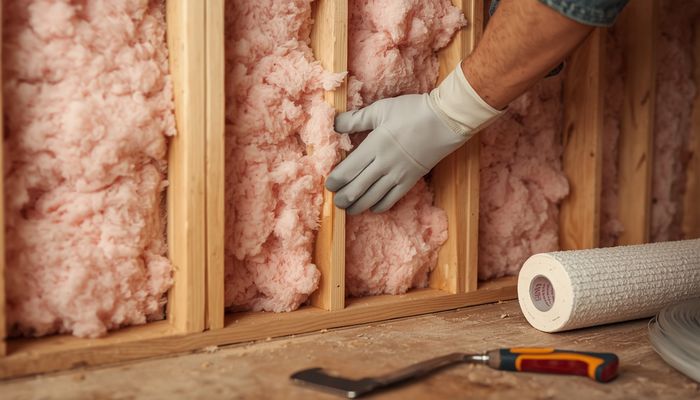
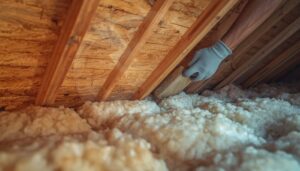
Compression is the enemy. Fiberglass works because of the air between the fibers. Crush a 10-inch batt into a 6-inch cavity and congratulations — you just bought expensive filler. You want the batt to sit flush, not packed tight. Around electrical boxes, I learned to slice the batt in half thickness-wise so the back half slides behind the box and the front half covers it. Around wires, split the batt and let the wire run through the middle, not over the top. Small gaps around outlets and switch boxes can add up to the equivalent of leaving a window cracked open year-round.
The vapor barrier question confused me for years. Kraft-faced batts have paper on one side and that paper goes toward the warm-in-winter side of the house. In most of the US, that means against the drywall, facing you as you install — not toward the exterior sheathing. I got this backwards on my first basement project and spent a weekend pulling it all out. In humid climates, getting the vapor barrier wrong means trapping moisture against your framing. That’s how you grow mold inside your walls.
Unfaced batts need a separate vapor barrier — 6-mil polyethylene is standard — or you skip it entirely if you’re in a dry climate. I always err on the side of using one. Cheap insurance.
What It Actually Costs
I paid $0.62 per square foot for the Owens Corning R-30 batts on my last attic job. That was the material only — I did the labor myself. Rolled R-19 for walls runs about $0.45 per square foot. Loose-fill fiberglass blown into an attic is the cheapest route, maybe $0.35 to $0.50 per square foot for material, though you need the blower machine, which Home Depot will lend you free if you buy enough bags.
Professional installation doubles or triples the material cost. I got quoted $1,800 to insulate my 800-square-foot attic with R-38. I did it myself for about $550 in materials and a weekend of suffering. Whether that trade-off makes sense depends entirely on your tolerance for standing in a 130-degree attic breathing fiberglass dust.
One cost people forget: the prep work. You need to air-seal before you insulate. That means cans of Great Stuff foam — the red can for gaps up to an inch, the blue can for bigger voids — and a lot of time on your hands and knees sealing every ceiling penetration. Recessed lights, plumbing vents, electrical boxes, attic hatches. Every tiny gap is a chimney for heated air. I once spent an entire Saturday just air-sealing a 1,200-square-foot attic. It wasn’t fun. But it probably saved more energy than the insulation itself.
Gear You Cannot Skip
After that first nightmare job, I don’t touch fiberglass without: an N95 mask minimum (I use a P100 respirator now), safety goggles that seal around the eyes, disposable coveralls from the paint aisle ($12 at Sherwin-Williams), and nitrile gloves with the sleeves taped. I also wear a bandana around my neck to keep fibers from dropping down my collar. You look ridiculous. You also don’t itch for three days.
Cold shower after, not hot. Hot water opens your pores. Cold water keeps them closed. Old-timer at the lumber yard taught me that one. It works.
When Fiberglass Is the Right Call
For most homeowners, fiberglass is the sweet spot. It’s cheaper than spray foam. It’s more DIY-friendly than blown cellulose. It doesn’t settle over time like cellulose can. It’s non-combustible. It doesn’t rot or mold if it stays dry. In attics with good access and standard joist spacing, batt insulation is a one-person weekend project.
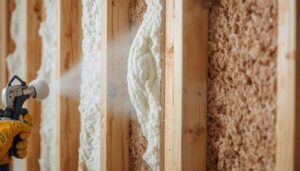
But I won’t use fiberglass everywhere. Below-grade basement walls? I go rigid foam. Crawl spaces with moisture issues? Closed-cell spray foam. Cathedral ceilings with no venting? That’s a spray foam job too. Fiberglass needs an air barrier to perform, and in tricky applications, the air barrier is harder to get right than the insulation itself.
My current house has a mix — fiberglass batts in the attic and exterior walls, rigid foam on the basement walls, and spray foam where the rim joist meets the foundation. Each material earns its place. Fiberglass owns the middle ground: good performance, low cost, manageable installation. You just have to respect what it is and what it isn’t. It doesn’t stop air. It doesn’t stop moisture. It traps heat. Treat it accordingly and it’ll do its job for the life of the house.
The itch fades. The energy bills don’t.
Does this work well in humid climates? I’m in the South and moisture is always a concern.
This answered questions I didn’t even know I had. Great practical advice here.