It was 2 a.m. on a Wednesday in April when I woke up to a sound I couldn’t place — a soft splashing, like someone pouring water from a pitcher. I stumbled downstairs and opened the basement door. The floor was covered in two inches of dark, cold groundwater. The sump pump had failed. Not the pump itself, as it turned out — the float switch had gotten stuck against the side of the pit, so the pump never turned on. By the time the water table rose high enough to force the float free, the motor was submerged and dead. I spent the next four hours with a wet vac and every towel in the house. Then I spent the next weekend learning way more about sump pumps than I ever wanted to know.
A sump pump is deceptively simple. There’s a pit in your basement floor — typically about 22 inches deep and 18 inches across — with a perforated liner that lets groundwater seep in. Inside the pit sits a pump on its side or upright. As the water level rises, a float switch trips and the pump kicks on, sending the water out through a discharge pipe to somewhere far enough from your foundation that it won’t just seep back in. When the water drops, the float drops and the pump shuts off. That’s it. One moving part, one switch, and your basement stays dry. Until one of those things fails at 2 a.m.
There are two types. Submersible pumps sit inside the pit, underwater, and are quieter and more powerful — these are what most homes have. Pedestal pumps keep the motor above the pit lid on a long shaft, which makes them louder but easier to service and generally cheaper. Most homes need a 1/3 or 1/2 horsepower pump that moves 30 to 60 gallons per minute. If you have a high water table or a finished basement you care about, go 1/2 HP.
What a Proper Setup Costs
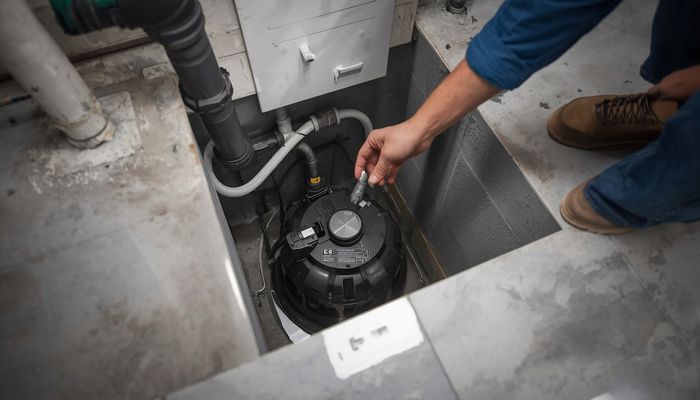
My replacement pump — a Zoeller M53, which is a cast iron 1/2 HP submersible — cost $220 at the plumbing supply house. Installing it into the existing pit took me about 90 minutes: unplug the old one, unscrew the discharge union, pull it out, drop the new one in, attach the check valve and discharge fitting, plug it in. I tested it by dumping a 5-gallon bucket of water into the pit and watching the float trip. Satisfying in a way only a functioning piece of emergency equipment can be.
If you’re starting from scratch — no pit, no pump, no discharge line — the cost is higher. A plumber or basement waterproofing company will charge $1,500 to $2,500 to cut the concrete, dig the pit, install the basin, plumb the discharge line, and install the pump. The pump itself is only $120 to $400 of that; the labor is in the concrete cutting and trenching. The discharge line needs to run at least 10 feet from the foundation and ideally to daylight on a downhill grade. Running an underground line adds $200 to $600 to the job.
One thing I strongly recommend: get a battery backup pump. After my flood, I installed a Wayne battery backup unit for $280, plus a deep-cycle AGM battery for $180. The backup sits on top of the primary pump and kicks in if the power goes out or the primary fails. That setup added about $500 total and took another hour to install. The AGM battery needs replacing every 3 to 5 years, but the peace of mind is worth it. A full primary-plus-backup setup typically lands between $1,200 and $2,800 depending on whether you need a new pit.
How Long They Last
Primary submersible pumps last 7 to 10 years on average. Heavy-duty cast iron units like my Zoeller or the Liberty 257 can go 12 to 15 years if the pit stays clean and the pump doesn’t cycle constantly. Cheaper plastic-bodied 1/3 HP pumps from the big box stores tend to fail at 4 to 7 years — they’re lighter and easier to install but the plastic housing can crack. Battery backup pumps last 5 to 7 years. The top brands in residential sump pumps are Zoeller, Liberty Pumps, and Wayne — all three make reliable cast-iron units with mechanical float switches that are less prone to sticking than the pressure-switch types on budget models.
Can You Do It Yourself?
Replacing a pump in an existing pit is absolutely a DIY job. It’s unplug, unscrew, pull out, drop in, reconnect, test. An hour or two even if you’re slow. I’d never done it before and it went fine. The key things to check: make sure the new check valve is installed in the correct orientation (arrow points away from the pump), use a rubber coupling or union so you can service it later without cutting pipe, and test the float switch by filling the pit manually — don’t wait for a storm to find out you installed it wrong.
Installing a new pit from scratch is not DIY unless you own a concrete saw and know how to dig a 4-foot hole through a slab without hitting anything important. That’s a contractor job. Same goes for running new discharge lines through finished walls or underground.
My basement has been dry through two springs since that night. I test the pump every March by dumping a bucket in the pit, and I replaced the backup battery last year on schedule. The setup cost me about $500 in parts and an afternoon of my time, which feels like a bargain compared to replacing flooring, drywall, and everything else water ruins. If you have a sump pump you haven’t thought about in years, go down and test it right now. Fill the pit and make sure it kicks on. Future you at 2 a.m. will be grateful.