The Drill That Almost Went Through My Hand
My first cordless drill was a $29 Black & Decker from a Black Friday bin. It had a NiCad battery that took four hours to charge and lasted maybe 15 minutes. The chuck was plastic and wouldn’t hold a bit straight. It stripped more screws than it drove. I hated every minute of using it, and I used it for three years because I didn’t know any better.
Then I borrowed a friend’s Milwaukee M18 and everything changed. The first screw I drove went in straight, flush, and the drill didn’t even slow down. I bought my own Milwaukee the next weekend and I’ve never looked back. Here’s what I learned about cordless drills after burning through six of them across 15 years of DIY projects.
Voltage Isn’t Everything (But 12V Is Too Little)
The drill aisle at Home Depot wants you to believe that more volts equals more better. That’s mostly marketing. An 18V or 20V drill (they’re the same thing — 20V Max is the peak voltage, 18V is the nominal) will handle 99% of what a homeowner needs: drilling holes in wood, driving 3-inch deck screws, mixing small batches of thinset, running a hole saw through drywall.
12V drills are lighter and smaller, which is genuinely nice when you’re working overhead or in a tight cabinet. I have a 12V Bosch that lives in my kitchen junk drawer for quick furniture assembly. But try to drive a 3-inch lag screw with it and the motor will stall immediately. If you only buy one drill, make it 18V/20V.
Above 20V, you’re in pro territory. The 24V Kobalt and 36V Makita tools are for framers and deck builders who drive hundreds of structural screws per day. You don’t need that. I don’t need that. Spend the money on better bits instead.
Brushless vs Brushed: Pay the Extra $30
This one actually matters. Brushed motors use carbon brushes that physically contact the spinning part — they wear out, they spark, they’re less efficient. Brushless motors use magnets and electronics to spin the motor with no physical contact. They last longer, the battery lasts longer per charge (20-30% more runtime), and they’re quieter.
The price difference on a drill kit is usually $30-$50. Pay it. Every drill I own now is brushless and I’ve never had one die. The brushed ones? Two of them smoked and seized after a few years of heavy use.
What I’d Actually Buy at Each Price Point
Under $100: The Ryobi 18V One+ brushless drill ($79 at Home Depot, often on sale with a battery). Ryobi gets mocked by pros but their One+ system has been using the same battery platform since 1996 — that’s 28 years of compatibility. For a homeowner who does occasional projects, Ryobi is the best value in power tools. Their brushless drill is genuinely good and the ecosystem of 200+ tools that use the same battery is unmatched at this price.
$100-$200: The DeWalt 20V Atomic or Ridgid 18V brushless. DeWalt’s Atomic line is compact (good for tight spaces) but still powerful. Ridgid’s big selling point is the lifetime service agreement — register the tool and they’ll replace the batteries for free when they die, which batteries always do. I have the Ridgid sub-compact and it’s my go-to for anything inside the house.
$200+: Milwaukee M18 Fuel. This is what I use. It’s expensive (about $200 for the bare tool, $300+ for a kit with charger and two batteries), but it has more torque than any homeowner needs and the build quality is obvious. The chuck is all metal, the trigger is buttery, and the LED work light stays on for 10 seconds after you release the trigger instead of turning off immediately like cheaper drills. I’ve dropped mine off a ladder onto concrete. It dented the concrete.
Makita is the other premium option. Their 18V LXT line is excellent — slightly lighter than Milwaukee, slightly less torque, slightly more ergonomic. If you’re left-handed, Makita’s ambidextrous design is more comfortable. I’m team red (Milwaukee) but team teal (Makita) is a totally valid choice.
Batteries Are the Real Investment
Nobody tells you this when you’re starting: the drill body is cheap. The batteries are what you’re really paying for. A 5.0Ah M18 battery costs $120 by itself. Two batteries plus a charger often costs more than the drill. This is why brand loyalty matters — once you have four Milwaukee batteries, you’re going to buy Milwaukee tools forever because buying into a new battery system means starting over.
For a homeowner, two 2.0Ah batteries and a charger is plenty. 2.0Ah gives you about 30-45 minutes of actual drilling and driving. That’s enough for a full day of intermittent DIY because you’re measuring, cutting, and thinking more than you’re actually pulling the trigger. The 5.0Ah batteries are for pros who drill holes for eight hours straight.
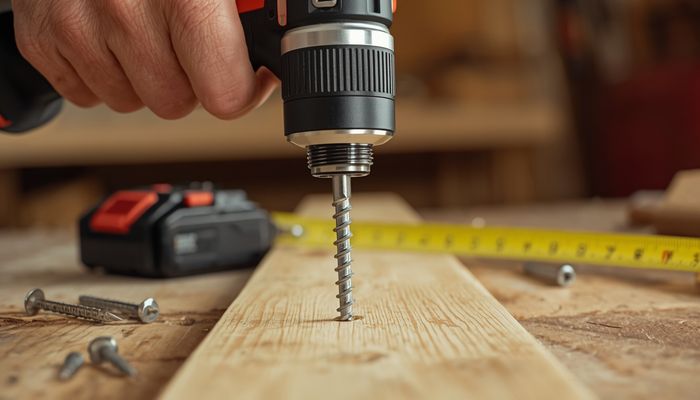
The Bits That Actually Matter
An expensive drill with cheap bits is like a sports car with bald tires. I learned this the hard way — I used the free bits that came with a box of screws for years and couldn’t figure out why every screw head stripped. Here’s what I use now:
For driving screws: Milwaukee Shockwave or DeWalt MaxFit impact-rated bits. They have a torsion zone that absorbs the impact instead of snapping the bit. A 30-piece set is $20 and lasts me about a year of heavy use.
For drilling: A set of black oxide or titanium twist bits (DeWalt or Bosch, $25 for a 21-piece set). For bigger holes, a set of spade bits (Irwin Speedbor, $15) for rough work and Forstner bits for clean holes.
The one upgrade that genuinely changed my life: a quick-change hex shank system. Instead of loosening and tightening the chuck every time I switched from a drill bit to a driver bit, I use hex-shank drill bits that pop in and out in one second. The chuck stays open and I never have to re-center. It saves maybe 15 seconds per bit change, which adds up to about 10 minutes over a day, which is 10 minutes I’d rather spend doing literally anything else.
One Final Thing: The Clutch
Every drill has a numbered collar behind the chuck — that’s the clutch. Numbers 1 through maybe 15 or 20, then a drill symbol. The clutch limits how much torque the drill applies before it disengages with a ratcheting sound. Setting 1 is basically finger-tight. Setting 15 is “stripped screw head.”
I drove screws for years on the drill setting (maximum torque) and wondered why every screw either stripped or sank three inches into the wood. Use the clutch. For cabinet screws, I set it to 5. For deck screws, 10. For lag bolts, maybe 15. It takes 20 seconds to dial in and it will save you from every stripped screw you’ve ever created.
The Black & Decker from my twenties? I finally threw it away last year. The chuck had seized, both batteries were dead, and the replacement batteries cost more than a new Ryobi kit. It served its purpose: it taught me what a bad drill feels like, so I’d know a good one when I found it.