Installing a smart thermostat is one of the highest-payback DIY upgrades in a home: it’s usually
a 30–60 minute job with a single screwdriver, and it starts trimming heating and cooling costs
the day you set a schedule. This guide walks through compatibility (where most people get stuck),
the exact wiring steps, and how to actually capture the energy savings instead of just mounting a
prettier screen.
TL;DR: Most smart thermostats install in 30–60 minutes. The one thing that trips people up is
the C-wire (common wire) — check for it before you buy. Turn off power at the breaker,
photograph the old wiring, match wires to the new base by terminal letter (not color), then
set up the app. Expect roughly 8–15% off heating and cooling from smarter scheduling.
Will a smart thermostat work in my home? (Check this first)
Before buying anything, gently pull your current thermostat off the wall and look at the wiring.
Nearly every compatibility problem comes down to two things: the C-wire and your system type.
| Your setup | Compatible? | Notes |
|---|---|---|
Has a C-wire (terminal labeled C) |
✅ Yes | Ideal — steady power, all features |
| No C-wire, but an unused wire in the wall | ✅ Usually | Re-purpose the spare as a C-wire |
| No C-wire, no spare | ⚠️ Sometimes | Use the included C-wire adapter / power kit |
| Line-voltage (120–240V baseboard/electric heat) | ❌ Rarely | Needs a dedicated line-voltage smart thermostat |
| Heat pump w/ aux or emergency heat | ✅ Yes | Map O/B, AUX, E terminals carefully |
What the terminal letters mean: R/Rc/Rh = power; W = heat; Y = cooling; G = fan;
C = common (constant power); O/B = heat-pump reversing valve. Photograph how yours are wired
before touching anything.
The #1 reason a smart thermostat won’t work is a missing C-wire. Confirm it before you buy.
Types of smart thermostats
- Learning thermostats build a schedule automatically from your behavior — least hands-on.
- Programmable Wi-Fi thermostats let you set schedules manually in an app — more control,
usually cheaper. - Zoned-system thermostats manage multiple areas; make sure the model supports your zone setup.
Tools & what you’ll need
- Phillips + flat-head screwdriver
- Smartphone (setup app + to photograph the wiring)
- Optional: small level, drywall anchors (usually included)
- 20–60 minutes
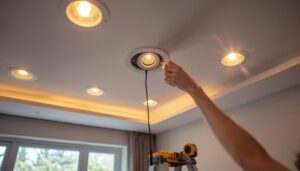
Step-by-step installation
- Cut power at the breaker. Switch off the furnace / air-handler circuit and confirm the old
thermostat screen is dead. The wiring is low-voltage, but the equipment it controls isn’t. - Photograph the existing wiring. A clear, well-lit photo of every wire and its lettered
terminal is your safety net — you can always restore exactly what was there. - Label the wires with the included stickers. Match by terminal letter, not color —
wire colors are not standardized between homes. - Remove the old base, thread the wires through the new backplate, level it, and anchor it.
- Connect each wire to its matching lettered terminal; seat fully and give a gentle tug to
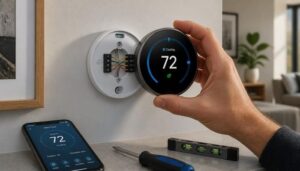
confirm. No C-wire? Install the included adapter now, following its diagram. - Attach the display, restore power, and complete app setup — Wi-Fi, system type, schedule.
- Test every mode — heat, cool, and fan — and confirm the equipment actually starts for each.
What it costs
- Device: budget Wi-Fi models are inexpensive; premium learning models cost more but add
sensors and automation. - DIY: effectively free beyond the thermostat if your wiring is standard.
- Pro install: a reasonable option for line-voltage systems, missing C-wires with no easy run,
or complex heat pumps.
Getting real energy savings (the part that matters)
The hardware doesn’t save money — the schedule and behavior do:
– Set back 7–10°F while asleep or away — this is where most of the savings come from.
– Enable geofencing / eco mode so the system responds to whether anyone’s home.
– Use adaptive/early-start recovery so the house is comfortable at wake time rather than
blasting the system right beforehand.
– Review the app’s usage reports monthly and tighten the schedule.
Independent estimates put typical savings around 8–15% on heating and cooling — more if you’re
upgrading from a manual thermostat you rarely adjusted.
Troubleshooting
- Thermostat won’t power on: almost always a C-wire issue — verify the adapter or C connection.
- Heating/cooling won’t start: re-check
W/Yagainst your pre-removal photo. - Short-cycling or wrong mode on a heat pump: the
O/Breversing-valve setting is likely wrong
in the app’s system configuration. - Wi-Fi keeps dropping: typically inadequate constant power — a proper C-wire fixes it.
When to call a pro instead
- Line-voltage (120–240V) systems — wrong product class; get a line-voltage model or an electrician.
- No C-wire and no way to run one on a system the adapter doesn’t cover.
- Multi-stage or complex heat-pump setups where the terminals don’t map cleanly.
FAQ
Do I need a C-wire for a smart thermostat?
Not always — many models include a power adapter or work without one — but a C-wire is the most
reliable option and prevents intermittent power and Wi-Fi problems.
Can I install a smart thermostat myself?
Yes. For a standard low-voltage (24V) forced-air system it’s a 30–60 minute job. Line-voltage
systems and complex heat pumps are the main exceptions.
Will a smart thermostat actually lower my bills?
Only if you use the scheduling, setbacks, and eco features. The savings come from behavior, not the
device on the wall.
What if I wire it wrong?
That’s exactly what the pre-removal photo is for: cut power, restore the wires to their
photographed positions, and start again.
How long does installation take?
Most standard installs take 20–60 minutes, including app setup and testing.