The Hot Water Baptism
I remember the exact moment I learned to double-check every shutoff valve. I was under our powder room sink, basin wrench in hand, feeling competent. The cold water supply disconnected without drama — a tidy dribble caught by my bucket. Then I reached for the hot side. The valve was old and stiff. I’d turned it clockwise until it felt snug and assumed that meant closed. It didn’t. When I loosened the compression nut, a jet of hot water shot straight into my chest. My wife came running from the kitchen. She found me soaked, sputtering, one hand clamped over the geyser while the other fumbled for the main shutoff. Twelve years later, she still tells this story at dinner parties. I’ve installed maybe eight faucets since then without incident. The difference between that disaster and every subsequent success came down to knowing what actually matters.
Gather the Right Tools Before You Get Under There
Here’s what lives in my faucet-install kit now, earned through trial and error:
| Tool | Purpose | Cost |
|---|---|---|
| Adjustable wrench (two) | One for holding, one for turning | $10-$25 |
| Basin wrench | The only way to reach mounting nuts behind the bowl | $12-$20 |
| Phillips and flathead screwdrivers | Old faucets hide screws in strange places | $5-$15 |
| Bucket or mixing bowl | Water will spill. Plan for it. | $2-$5 |
| Old towels or rags | Spread them everywhere inside the cabinet | $1-$5 |
| Teflon tape | Thread sealant for connections without rubber gaskets | $2-$4 |
| Headlamp | You need both hands. A flashlight in your mouth is not a strategy. | $5-$20 |
Skip the plumber’s putty unless the manufacturer explicitly calls for it. Modern faucets ship with a rubber base gasket. Adding putty on top creates an uneven seal that drips. I learned this on faucet number three when a persistent weep forced me to pull everything apart and restart.
How Long This Actually Takes
That first faucet consumed three hours. Now I can swap one in about 90 minutes:
- Shutting off water and clearing the cabinet: 15 minutes
- Removing the old faucet: 20-45 minutes — longer if mounting nuts are corroded
- Cleaning the sink deck: 10 minutes
- Installing the new faucet: 30-60 minutes
- Connecting lines and leak-testing: 15-20 minutes
- Cleanup: 10 minutes
Budget an extra trip to the hardware store if your supply lines are too short or a shutoff valve crumbles when you touch it. Both have happened to me at 3 p.m. on a Saturday.
Safety Lessons
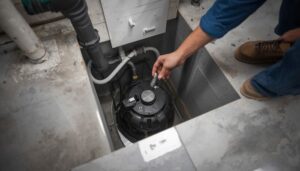
Turn both shutoff valves clockwise until they stop — not until they feel tight, until they actually stop. Then open the faucet to drain residual water. If the valves are frozen or missing, shut off the main house supply. It’s a hassle, but better than hot water to the chest. Unplug the garbage disposal or flip its breaker before reaching under the sink. Keep a dry rag in your back pocket for wiping hands before touching anything electrical. Wear safety glasses when you’re on your back looking up — rust flakes and mineral crust will rain into your eyes. Let the hot water line cool for ten minutes after shutting off the supply. I was impatient on faucet number one. Don’t be me.
My Step-by-Step Process
- Shut the water off completely. Both valves, fully clockwise. Open the faucet to release pressure. Bucket under the supply connections.
- Disconnect the old supply lines. Loosen the nuts at the shutoff valves with your wrench. Water will come out — that’s what the towels are for.
- Remove the mounting nuts. Large brass nuts clamping the faucet to the sink underside. Basin wrench territory. If stuck, penetrating oil and five minutes of patience. Forcing can crack granite or quartz.
- Lift the old faucet out. Scrape old putty from the mounting holes with a putty knife. Wipe clean.
- Read the new faucet’s instructions. Seriously. Gasket or putty? Most use only the included rubber gasket.
- Drop the new faucet through the holes. Line up the threaded shanks. A helper above makes this easier but isn’t required.
- Tighten the mounting nuts from below. Hand-tight first, then basin wrench. Stop when the faucet doesn’t wiggle. Overtightening cracks sinks.
- Connect the supply lines. Most new faucets include pre-attached braided lines. If not, wrap Teflon tape clockwise, two to three wraps, then hand-tighten plus a quarter-turn with the wrench.
- Attach the other ends to the shutoff valves. Hot to hot, cold to cold. Hand-tight then quarter-turn. Brass threads strip easily.
- Turn the water on slowly. Crack each valve open. Listen for hissing. Check every connection with a dry paper towel — under the sink, at the faucet base, at every nut. Tighten any drip by a quarter-turn.
- Flush the faucet. Run hot and cold for two minutes to clear debris. Cycle every setting.
- Do the overnight test. Leave a dry paper towel under the sink overnight. Dry in the morning means you’re done. Damp means you caught a slow leak before it rotted the cabinet.
The Mistakes I’ve Made
Overtightening everything. Brass is soft. Crank a supply line nut past snug and you’ll strip the threads. Tighten to resistance plus a quarter-turn and stop. Cross-threading: always start nuts by hand, never with a wrench. If you feel resistance before the threads engage, back out and try again. Forgetting to measure supply lines: the included braided lines are typically 12 to 20 inches. Measure the distance from faucet shanks to shutoff valves before starting. Longer replacements are $8 to $15 at any hardware store. Discovering this mid-install at closing time is a special kind of misery.
When to Call a Plumber
I can handle most swaps now, but I’d pick up the phone if there are no shutoff valves under the sink and new ones need soldering, the old faucet is rust-welded to the deck, there’s visible water damage or mold inside the cabinet, the hole pattern doesn’t match and I’d need to drill stone or porcelain, or the faucet has electronic components. A plumber costs $100 to $250 for a standard swap. Water damage from a bad DIY job can run thousands. But honestly, most faucet swaps are one of the most approachable plumbing projects in the house. If the guy who once soaked himself in front of his wife can knock these out in 90 minutes, you can too.