Knockdown Texture Application and Benefits
TL;DR: Knockdown texture is a popular drywall finish created by spraying joint compound onto a wall or ceiling and then flattening (knocking down) the high points with a wide knife while still wet. It hides minor imperfections, adds visual interest, and has dominated U.S. residential drywall finishes since the 1980s. DIY material cost is $20-$80 per room; professional application runs $1-$3 per square foot. Properly applied knockdown lasts the life of the wall. The skill is achievable but practice on cardboard or in a closet first; matching existing knockdown after a repair is the hardest DIY scenario.
What Is Knockdown Texture?
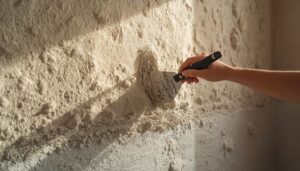
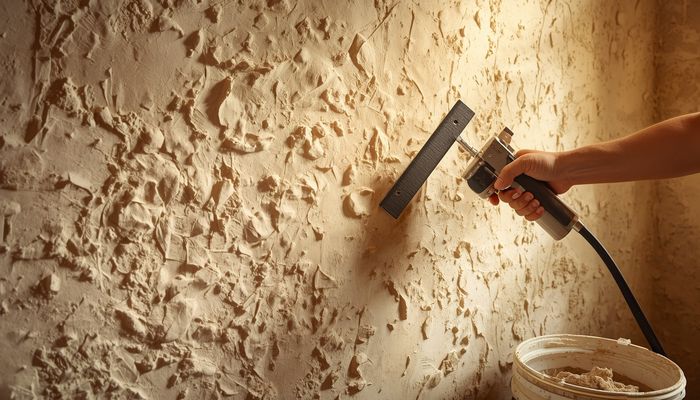
Knockdown texture is created in two steps. First, thinned joint compound is sprayed onto the wall via a hopper gun or aerosol can, producing a stippled or splattered pattern of small droplets. Second, after a 10-60 second wait (depending on humidity), a wide drywall knife is dragged across the surface to flatten the highest peaks while leaving the lower texture intact. The result is a low-relief pattern resembling stucco or thin-skip plaster.
How Much Does Knockdown Texture Cost?
DIY knockdown costs $20-$80 per room: a 5-gallon bucket of joint compound ($12-$18), a hopper gun rental ($30/day) or aerosol cans ($12-$20 each for small areas), and a 12-inch drywall knife ($15). Professional application costs $1-$3 per square foot of wall area, totaling $400-$1,500 for an average bedroom or living room.
| Application | DIY Cost | Pro Cost |
|---|---|---|
| Small repair patch | $15-$30 | $150-$300 |
| Single room | $30-$80 | $400-$1,500 |
| Whole house | $200-$500 | $3,000-$10,000 |
| Ceiling only | $20-$60 | $300-$1,000 |
| Match existing knockdown (single wall) | $25-$60 | $200-$600 |
How Long Does Knockdown Texture Last?
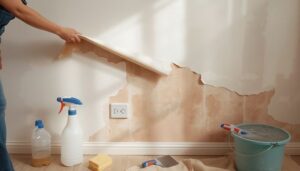
Knockdown texture lasts the life of the wall (50+ years) when properly applied over a sealed substrate. The only failure modes are water damage (always replace, since the compound rehydrates and loses adhesion), impact damage (chips can be patched), and paint buildup over multiple repaints that fills in the texture pattern (a sign to skim and re-texture).
Can I DIY Knockdown Texture?
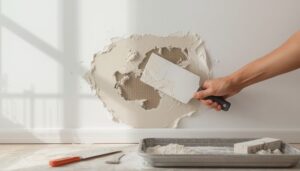
Applying knockdown to a new wall is a strong intermediate DIY project for someone willing to practice. Plan a full day per room: prep the wall (prime any patches, repair any holes), mix the compound to a thin gravy consistency, load the hopper gun, spray in even passes about 18 inches from the wall, wait 30-60 seconds for the surface to start drying, then drag a 12-18 inch knife across the surface at a 5-10 degree angle to knock down the peaks. Practice on cardboard first to dial in compound consistency and knockdown timing.
Matching existing knockdown after a small repair is the hardest scenario. The pattern, droplet size, and depth of knockdown all need to match the original. Practice on cardboard until your sample looks like the wall, then transfer skills to the actual repair. Spray cans (Homax Knockdown) are easier than a hopper gun for single patches and produce decent matches for 6-12 inch repairs.
What Are the Best Knockdown Texture Options?
For full-room application, a hopper gun (rental $30/day, purchase $80-$200) is the only realistic tool. For patches and touch-ups, Homax Pro Grade Knockdown spray cans ($12-$20 each) are the standard. Joint compound brand matters less; USG All Purpose and ProForm both work well.
| Tool | Best For | Cost |
|---|---|---|
| Hopper gun | Full room or larger | $80-$200 (rent $30/day) |
| Aerosol can knockdown | Patches under 12 inches | $12-$20 per can |
| 12-18 inch drywall knife | Knockdown step | $15-$30 |
| Compound thinner (water) | – | Free (mix to soup consistency) |
| Drop cloths and tarps | Essential | $10-$40 |
When Should I Replace or Upgrade Knockdown Texture?
Re-skim and re-texture when paint buildup has filled in the original texture (looks smoother and shinier than newer walls), repair patches do not blend after multiple attempts, water damage has caused crumbling or staining, or you simply want to change the texture style (smooth, light orange peel, etc.). Skim coating over existing knockdown is faster than removing the existing texture and starting over.
Knockdown vs orange peel: which is better?
Knockdown hides more wall imperfection because of the higher relief, and is more popular in the U.S. since the 1990s. Orange peel is subtler and works better with modern lighting (less shadow detail). For a refresh that hides damage, knockdown wins; for a contemporary smooth-but-not-bare look, orange peel.
Can I skip the priming step?
No. Fresh joint compound is highly absorbent and will pull moisture out of the texture compound, changing how it sprays and knocks down. Always prime patches with a drywall primer-sealer (like Zinsser Bulls Eye 1-2-3) before texturing.
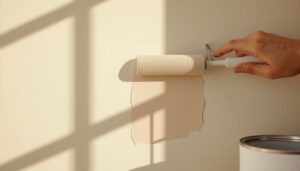
How long until I can paint over knockdown?
Knockdown texture needs 24-48 hours to dry fully before painting. Prime with a high-build drywall primer to fill the small voids, then apply 2 coats of flat or eggshell wall paint. Glossy paint exaggerates the texture pattern; flat or eggshell soften the look.
Can I remove knockdown texture?
Yes. The most reliable method is skim coating (3-4 thin coats of joint compound feathered over the entire wall), sanding between coats. Alternatively, you can spray the wall with water, wait 15-30 minutes for the compound to soften, then scrape with a wide knife. Wet method is messy and only practical on small rooms.