TL;DR: Installing recessed lighting is a weekend project that can transform a dim room. You’ll need to plan your layout, cut holes in the ceiling, run electrical wire from a switch, and connect IC-rated LED lights. This guide covers everything from tools to safety, with step-by-step instructions for a clean, professional-looking finish.
What You’ll Need
Before you start, gather all the tools and materials. Here’s a complete list with estimated costs from Home Depot or Lowe’s. Prices may vary by region.
| Tool / Material | Estimated Cost | Notes |
|---|---|---|
| IC-rated LED recessed lights (6-pack) | $60–$120 | Choose “new construction” or “remodel” housing; LED trim included |
| 14/2 NM-B electrical wire (50 ft) | $15–$25 | For 15-amp circuit; 12/2 for 20-amp circuits |
| Wire connectors (wire nuts, 10-pack) | $3–$5 | Assorted sizes |
| Single-pole switch and wall box | $10–$20 | Includes switch, cover plate, and box |
| Voltage tester (non-contact) | $15–$30 | Essential for safety |
| Drywall saw (keyhole or jab saw) | $10–$15 | For cutting ceiling holes |
| Wire stripper / cutter | $8–$15 | Multi-tool works best |
| Fish tape | $10–$20 | For pulling wire through walls/ceilings |
| Stud finder | $15–$30 | Cheap magnetic ones work fine |
| Drill with hole saw (for switch box) | $5–$15 (bit only) | 1/2″ or 3/4″ bit for running wire |
| Safety glasses, gloves, dust mask | $10–$20 | Always wear these |
| Ladder (step ladder or extension) | $30–$80 (if needed) | Rent if you don’t own one |
Total estimated cost: $150–$350, depending on how many lights (6-pack) and whether you already own tools.
How Long Does This Take?
For a typical 12×12 foot room with 4 lights and a new switch, plan for 6–10 hours total. Here’s a breakdown:
- Planning and marking layout: 30–60 minutes
- Cutting ceiling holes: 30–60 minutes
- Running electrical wire: 2–4 hours
- Wiring the switch and lights: 1–2 hours
- Installing light housings and trims: 30–60 minutes
- Testing and cleanup: 30 minutes
If you need to access the attic for wiring, add 1–2 hours. First-timers should budget a full day.
Safety First
Turn off the power at the circuit breaker before doing any electrical work. Never rely on a wall switch alone to cut power. Use a non-contact voltage tester to confirm wires are dead before touching them.
Wear safety glasses and a dust mask when cutting drywall. Ceiling dust contains fine particles that can irritate lungs. Use a ladder rated for your weight and set it on a stable surface.
Only use IC-rated (Insulation Contact) lights if your ceiling has insulation. Non-IC lights can overheat and cause fires. Check the light box for “IC” marking.
Never work alone near live circuits. Have someone nearby who can call for help if needed. If you’re unsure about any step, stop and consult a licensed electrician.
For more on electrical safety basics, read our guide to home electrical safety for DIYers.
Step-by-Step Instructions
Follow these steps in order. Work slowly and double-check each connection.
- Plan your light layout. Use a tape measure to mark light positions on the ceiling. Standard spacing is 4–6 feet apart, with lights 2–3 feet from walls. Use a stud finder to avoid joists. Draw circles where each light will go.
- Cut the ceiling holes. Use the template included with your lights to trace a circle. Cut carefully with a drywall saw. Go slow to avoid damaging surrounding drywall. Wear a dust mask.
- Run wire from the switch to the first light. Turn off the breaker. Remove the existing switch plate and switch (if replacing). Drill a 1/2-inch hole through the top plate of the wall into the attic (or through the ceiling if no attic). Use fish tape to pull 14/2 wire from the switch location to the first light hole. Leave 12 inches of extra wire at each end.
- Connect the lights in series. From the first light hole, run wire to the next light hole, and so on. Use wire nuts to connect black to black (hot), white to white (neutral), and bare copper to bare copper (ground). Tuck wires into the junction box of each light housing.
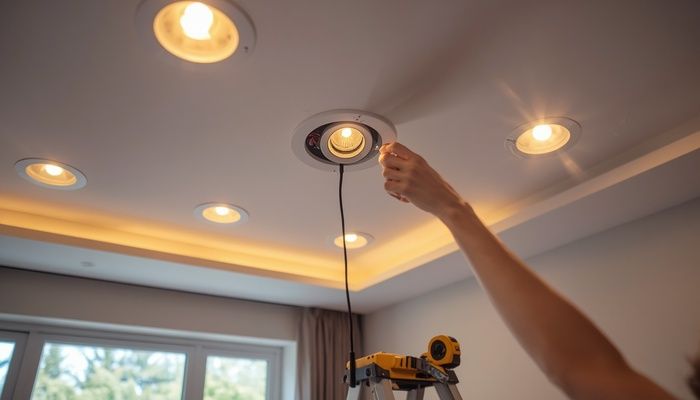
- Install the light housings. For remodel housings, insert the housing into the hole from below. Push the spring clips up and tighten them against the drywall. Ensure the housing is flush with the ceiling. For new construction housings, nail them to the joists before drywall (skip if remodeling).
- Wire the switch. At the switch box, connect the black wire from the power source to one screw on the switch. Connect the black wire going to the lights to the other screw. Connect all white wires together with a wire nut. Connect all ground wires together and to the switch’s green screw. Attach the switch to the box and install the cover plate.
- Install the LED trims. Each light trim usually clips or twists into the housing. Follow the manufacturer’s instructions. Push the trim up until it snaps in place. Some trims have a separate bulb—screw it in first.
- Turn on the power and test. Restore power at the breaker. Flip the switch. If lights don’t work, turn off power and check wire connections. Use a voltage tester to confirm power is reaching the lights.
- Patch any drywall damage. If you cut holes too large or cracked the ceiling, use joint compound and a putty knife to smooth it out. Let dry, sand, and paint.
For a more detailed explanation of wiring a switch, see our how to wire a light switch tutorial.
Common Mistakes to Avoid
- Cutting holes too close to joists. Always use a stud finder. If a hole lands on a joist, move the light 6 inches in either direction. Cutting into a joist weakens the ceiling structure.
- Using non-IC lights near insulation. Non-IC lights require 3 inches of clearance from insulation. If your attic has loose fill or batt insulation, always buy IC-rated lights. They cost a bit more but prevent fire risk.
- Overloading the circuit. A 15-amp circuit can handle about 1,440 watts (80% of 1,800). Most LED lights use 10–15 watts each, so you can safely install 10–12 lights on one circuit. Add up wattage before starting.
- Forgetting to leave extra wire. Always leave at least 12 inches of wire at each light and switch box. You’ll need slack for connections and future adjustments. Too short means you have to re-run wire.
- Not checking for ceiling obstructions. Before cutting, check for pipes, ducts, or cables above the ceiling. Use a small probe or look in the attic if accessible. Hitting a pipe means a costly repair.
When to Call a Professional
Some situations are best left to a licensed electrician. Call one if:
- Your ceiling has no attic access and you can’t run wire from below. Fishing wire through finished ceilings is tricky and may require cutting multiple holes.
- You need to add a new circuit breaker. Adding a breaker to the panel requires special tools and knowledge. Mistakes can cause fires or electrocution.
- Your home has aluminum wiring. Aluminum wiring needs special connectors and techniques. DIY connections can overheat and fail.
- You’re uncomfortable with any step. If you don’t fully understand the wiring or safety steps, hire an electrician. It’s cheaper than a fire or injury.
Learn more about when to DIY vs. hire a pro in our home electrical projects guide.
Frequently Asked Questions
Q: Can I install recessed lights without attic access?
A: Yes, but it’s harder. You’ll need to cut holes in the ceiling and use fish tape to run wire between them. Remodel housings work from below. Plan extra time for this approach.
Q: How many recessed lights do I need for a room?
A: A general rule is one light per 4–6 square feet. For a 12×12 room (144 sq ft), 4–6 lights work well. Use a lighting calculator online for precise numbers based on ceiling height and bulb brightness.
Q: Do I need a permit for this project?
A: In most areas, replacing existing fixtures doesn’t require a permit. Adding new circuits or lights often does. Check with your local building department. Permits cost $50–$150 but ensure safety.
Q: Can I use dimmer switches with LED recessed lights?
A: Yes, but you need a compatible dimmer. Look for “LED-compatible” or “CL” rated dimmers. Standard dimmers can cause flickering or buzzing. Match the dimmer’s wattage rating to your total light load.
Q: What size recessed lights should I buy?
A: 4-inch and 6-inch lights are most common. 6-inch lights provide broader light and work well in living rooms. 4-inch lights are better for kitchens or accent lighting. Choose based on room size and desired brightness.
For more on choosing the right lights, read our recessed lighting buyer’s guide.