TL;DR: Painting trim and baseboards refreshes any room for under $100 in materials. This guide covers the essential tools you need—from brushes and sandpaper to paint and primer—plus step-by-step instructions for a professional-looking finish. Expect to spend 4–8 hours total, including drying time.
What You’ll Need
Here’s your complete checklist of tools and materials. Prices are estimates from Home Depot or Lowe’s as of 2025.
| Item | Purpose | Estimated Cost |
|---|---|---|
| Angled sash brush (2–2.5 inch) | Cutting in along edges and corners | $8–$15 |
| Small foam roller (4 inch) with tray | Smooth finish on flat trim surfaces | $5–$10 |
| Fine-grit sandpaper (220-grit) | Smoothing old paint and wood | $5–$8 per pack |
| Sandpaper block or sanding sponge | Even sanding pressure | $4–$7 |
| Tack cloth or lint-free rag | Removing dust after sanding | $4–$6 |
| Painter’s tape (1–2 inch wide) | Protecting walls and floors | $5–$10 per roll |
| Drop cloth (canvas or plastic) | Protecting floors and furniture | $10–$20 |
| Primer (water-based, stain-blocking) | Helping paint adhere and covering stains | $12–$20 per quart |
| Interior latex paint (semi-gloss or satin) | Durable, washable finish for trim | $15–$30 per quart |
| Putty knife and wood filler | Filling nail holes and gaps | $5–$10 |
| Caulk (paintable, latex) and caulk gun | Sealing gaps between trim and walls | $5–$10 |
| Clean bucket and sponge | Washing trim before painting | $3–$8 |
| Safety glasses and dust mask | Protecting eyes and lungs from dust | $5–$12 |
| Gloves (nitrile or rubber) | Keeping hands clean and safe | $5–$8 per box |
Total estimated cost: $60–$120 (most homeowners already have some items like tape and drop cloths).
How Long Does This Take?
Time depends on room size and trim condition. Here’s a realistic breakdown:
- Prep work (cleaning, sanding, filling holes): 1–2 hours
- Taping and masking: 30 minutes–1 hour
- Priming (one coat): 30 minutes–1 hour, plus 1–2 hours drying time
- Painting (two coats): 1–2 hours per coat, plus 2–4 hours drying between coats
- Cleanup and touch-ups: 30 minutes
Total active time: 4–6 hours. Total project time (including drying): 6–10 hours.
Safety First
Always work in a well-ventilated area. Paint fumes can cause dizziness or headaches. Open windows and use a fan if possible.
Wear safety glasses and a dust mask when sanding. Old paint may contain lead if your home was built before 1978. If you suspect lead paint, stop and test it with a lead test kit (available at hardware stores) or call a professional.
Keep paint and solvents away from heat sources and children. Store rags and drop cloths away from open flames—oil-based paints can spontaneously combust. Use water-based paints for easier cleanup and lower fumes.
Use gloves to protect your skin from chemicals. If you get paint in your eyes, flush with water for 15 minutes and seek medical help.
Step-by-Step Instructions
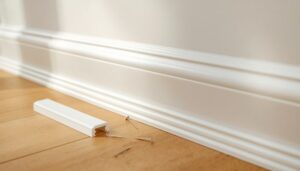
- Clear the room and protect surfaces. Move furniture away from walls. Lay drop cloths on the floor and tape them down. Remove outlet covers and switch plates. Time: 15–30 minutes.
- Clean the trim thoroughly. Mix warm water with a mild detergent (like dish soap). Use a sponge to wipe down all baseboards and trim to remove dust, grease, and grime. Rinse with clean water and let dry completely. Time: 30 minutes.
- Sand the trim. Use 220-grit sandpaper wrapped around a sanding block. Lightly sand all surfaces—this helps paint stick. Focus on glossy areas and rough spots. Wipe away dust with a tack cloth. Time: 30 minutes–1 hour.
- Fill nail holes and gaps. Apply wood filler with a putty knife to any nail holes, dents, or cracks. Let it dry per the filler’s instructions (usually 30 minutes). Sand smooth with fine-grit sandpaper. Time: 20 minutes, plus drying.
- Caulk the gaps. Load a caulk gun with paintable latex caulk. Run a thin bead along the seam between the trim and the wall. Smooth with a wet finger or caulking tool. Let dry completely (1–2 hours). Time: 15–30 minutes, plus drying.
- Apply painter’s tape. Tape along the edges of the trim where it meets the wall and floor. Press the tape down firmly to prevent paint bleeding. Time: 30 minutes.
- Prime the trim. Use a water-based stain-blocking primer. Dip your angled brush about one-third into the primer and tap off excess. Cut in along the top edge of the baseboard and around corners. Use the foam roller for flat areas. Apply a thin, even coat. Let dry 1–2 hours. Time: 30 minutes–1 hour, plus drying.
- Sand lightly after priming. Use a fine sanding sponge to gently smooth any brush marks or drips. Wipe away dust with a tack cloth. Time: 10 minutes.
- Apply the first coat of paint. Stir the paint thoroughly. Use the angled brush for edges and corners, then roll on paint with the foam roller for flat sections. Work in small sections (3–4 feet at a time) to maintain a wet edge. Let dry 2–4 hours. Time: 1–2 hours, plus drying.
- Apply the second coat. Repeat the same process as step 9. Use long, even strokes. Check for drips and smooth them immediately. Let dry overnight for best durability. Time: 1–2 hours, plus drying.
- Remove tape and clean up. Carefully peel off painter’s tape at a 45-degree angle while the paint is still slightly tacky (within 1 hour of finishing). This prevents peeling. Wash brushes and rollers with soap and water. Dispose of drop cloths or store them for reuse. Time: 15–30 minutes.
Common Mistakes to Avoid
- Skipping sanding or cleaning. Grease and old gloss prevent paint from sticking, leading to peeling within months. Always sand and clean thoroughly.
- Using the wrong brush or roller. A cheap brush leaves streaks. Invest in an angled sash brush for edges and a high-density foam roller for smooth finishes. Avoid thick nap rollers—they leave texture.
- Applying too thick a coat. Thick paint drips and takes forever to dry. Thin, even coats (two or three) look better and last longer. Use a “W” pattern with the roller to spread paint evenly.
- Not letting primer or paint dry fully. Rushing between coats causes bubbles and poor adhesion. Follow drying times on the can—humidity and temperature affect this.
- Caulking after painting. Caulk won’t stick to paint. Always caulk before priming and painting. For more on painting techniques, see our guide on how to choose the right paint finish for trim.
When to Call a Professional
While this project is DIY-friendly, call a pro if:
- You suspect lead paint. If your home was built before 1978, test first. Lead paint requires special handling and licensed contractors.
- Trim is heavily damaged or rotted. Replacing sections of baseboard or crown molding is more complex and may require carpentry skills. See our article on how to repair rotted wood trim.
- You have multiple rooms with tall ceilings or crown molding. Ladders and scaffolding increase risk. A pro can finish faster and safer.
- You’re short on time. If you can’t dedicate a full day to drying and painting, a pro can handle it in a single visit.
- You want a flawless, sprayed finish. Spraying trim provides a smooth, factory-like look but requires expensive equipment and masking. For more on spray vs. brush, check brush vs. spray painting trim: pros and cons.
Frequently Asked Questions
Q: Can I paint trim without sanding?
A: Not recommended. Sanding removes gloss and creates “tooth” for paint to grip. Without it, paint flakes off quickly. Use liquid deglosser as a last resort, but sanding is better.
Q: What paint finish is best for baseboards?
A: Semi-gloss or satin. These finishes are durable, washable, and resist scuffs. Flat paint shows marks and is hard to clean. Read the best paint sheen for interior trim for details.
Q: Do I need to prime if the trim is already painted?
A: Yes, if you’re changing colors or the old paint is glossy. Primer improves adhesion and blocks stains. For previously painted trim in good condition, you can skip primer if using a self-priming paint.
Q: How do I fix paint drips on my baseboards?
A: Let the drip dry completely, then sand it smooth with 220-grit sandpaper. Wipe dust and repaint that section. For more tips, see how to fix paint drips and runs.
Q: Can I use a regular paint roller for trim?
A: No—standard rollers are too thick and leave texture. Use a 4-inch foam roller (low-nap) for a smooth finish. For corners and edges, always use an angled brush.