TL;DR: Fixing drywall cracks is a manageable DIY project that requires basic tools like a utility knife, joint compound, and drywall tape. This guide covers everything from identifying the crack type to applying a smooth finish, with cost estimates under $40 and a total time of about 2–3 hours (plus drying time). You can save hundreds over hiring a pro.
What You’ll Need
Here’s a complete list of tools and materials you’ll need to fix drywall cracks. Most items are available at Home Depot or Lowe’s.
| Tool/Material | Purpose | Approx. Cost |
|---|---|---|
| Utility knife (with sharp blades) | Cutting drywall tape and scoring cracks | $5–$10 |
| Drywall saw (optional) | Enlarging cracks for deeper repair | $8–$15 |
| 6-inch drywall knife | Applying joint compound | $4–$8 |
| 12-inch drywall knife (or wide putty knife) | Feathering compound for smooth finish | $6–$12 |
| Drywall joint compound (pre-mixed, 1 gallon) | Filling and smoothing cracks | $10–$15 |
| Drywall tape (paper or fiberglass mesh) | Reinforcing cracks to prevent recurrence | $3–$6 |
| Sandpaper (120-grit and 220-grit) | Smoothing dried compound | $5–$8 |
| Sandpaper block or pole sander | Even sanding pressure | $5–$10 |
| Dust mask or respirator | Protecting lungs from drywall dust | $3–$10 |
| Drop cloth or plastic sheeting | Protecting floors and furniture | $5–$10 |
| Primer and paint (matching wall color) | Finishing the repair | $15–$30 |
| Paintbrush or roller | Applying primer and paint | $5–$15 |
Total estimated cost for materials: $30–$60 (if you don’t already have tools). Most homeowners already own a utility knife and sandpaper, so you might only need compound and tape.
How Long Does This Take?
This project is broken into three phases. Most of the time is waiting for compound to dry, so plan ahead.
- Phase 1: Preparation (15–20 minutes) – Clearing the area, protecting floors, and inspecting the crack.
- Phase 2: Applying compound and tape (30–45 minutes) – This includes filling, taping, and the first coat of compound.
- Phase 3: Sanding, priming, and painting (1–2 hours active, plus drying) – Sanding takes 15–30 minutes per coat. Each coat of compound needs 4–6 hours to dry. Primer and paint each need 2–4 hours to dry.
Total active time: About 2–3 hours. Total project time (including drying): 1–2 days.
Safety First
WARNING: Drywall dust can irritate your lungs, eyes, and skin. Always wear a dust mask or respirator when sanding. Use safety glasses to protect your eyes from debris.
WARNING: If the crack is near electrical outlets or light fixtures, turn off the power at the breaker before working. Water or compound could seep into wiring.
WARNING: If you suspect the crack is caused by structural issues (e.g., foundation settling, roof leaks, or large gaps), do not attempt a DIY repair. Call a professional immediately.
Work in a well-ventilated area. Open windows or use fans to reduce dust and fumes from primer/paint.
Step-by-Step Instructions
- Prepare the work area. Move furniture away from the wall or cover it with a drop cloth. Lay plastic sheeting on the floor. Put on your dust mask and safety glasses. Clear the crack of any loose paint, dust, or debris using a dry cloth or vacuum with a brush attachment.
- Inspect the crack. Use a utility knife to gently scrape along the crack. If it’s a hairline crack (less than 1/8 inch wide), you can proceed with tape. If it’s wider or has jagged edges, use a drywall saw to cut a V-shaped groove along the crack. This helps the compound grip better. Remove all loose drywall paper and dust.
- Apply the first coat of joint compound. Using your 6-inch drywall knife, scoop a small amount of joint compound onto the knife. Spread a thin layer over the crack, pressing it into the groove. Don’t worry about being neat—this is just a base layer. The compound should be about 1/16 inch thick.
- Embed the drywall tape. Cut a piece of drywall tape (paper or fiberglass mesh) that extends 2–3 inches beyond each end of the crack. For paper tape, press it into the wet compound, then run your knife over the tape to smooth it and remove air bubbles. For mesh tape, simply press it into the compound. The tape should be fully embedded and flat. Let this dry for 4–6 hours (or until it’s hard and no longer tacky).
- Apply the second coat of compound. Once the first coat is dry, use your 12-inch drywall knife to apply a wider, thinner layer over the tape. Start 2 inches above the crack and feather the compound outward, blending it into the surrounding wall. The goal is to create a smooth transition. Let this dry for 4–6 hours.
- Sand the repair. After the second coat is dry, use 120-grit sandpaper on a sanding block to lightly sand the area. Sand in a circular motion, focusing on any ridges or bumps. Wipe away dust with a damp cloth. If you see any low spots, apply a third thin coat of compound and let it dry before sanding again with 220-grit sandpaper.
- Prime the repaired area. Apply a thin coat of primer over the sanded area. This seals the compound and prevents it from absorbing paint unevenly. Let the primer dry completely (2–4 hours).
- Paint the wall. Use a paintbrush or roller to apply paint that matches your wall color. Apply two thin coats, letting each coat dry for 2–4 hours. Feather the paint into the surrounding wall to blend it in.
- Clean up. Remove drop cloths and plastic sheeting. Vacuum any remaining dust. Wash your tools with warm water (if using water-based compound) before it hardens.
Common Mistakes to Avoid
- Using too much compound in one coat. Thick layers take forever to dry and can crack again. Always apply thin coats (1/16 inch) and build up gradually.
- Skipping the tape. Without tape, the crack will likely reappear within weeks. Tape reinforces the joint and prevents movement.
- Not sanding between coats. Rough spots and ridges will show through paint. Always sand lightly after each coat dries.
- Painting over unprimed compound. Joint compound is porous and will absorb paint unevenly, leaving a dull spot. Always prime first.
- Ignoring the cause of the crack. If the crack is caused by a leak, foundation issue, or structural movement, your repair will fail. Address the root problem first.
When to Call a Professional
While most drywall cracks are cosmetic and easy to fix, some situations require a pro:
- Cracks wider than 1/4 inch – These may indicate structural issues like foundation settling or framing problems.
- Cracks that keep reappearing – If you fix a crack and it returns within months, there’s likely an underlying issue like moisture or movement.
- Cracks near doors or windows – These can be caused by shifting frames or poor installation. A pro can assess the frame and fix it properly.
- Cracks with water stains – This suggests a leak from the roof, plumbing, or siding. The leak must be fixed before repairing the drywall.
- Large areas of damaged drywall – If the crack is part of a larger damaged area (like a hole or crumbling drywall), you may need to cut out and replace a section of drywall, which is best left to a pro.
If you’re unsure, a licensed contractor can inspect the crack and give you peace of mind. The cost of a consultation is often worth it to avoid bigger problems later.
Frequently Asked Questions
Q: Can I use spackle instead of joint compound for drywall cracks?
A: Spackle is fine for very small cracks (like nail holes), but for cracks longer than a few inches, joint compound is better. It’s stronger, dries harder, and works with drywall tape. Spackle can shrink and crack over time.
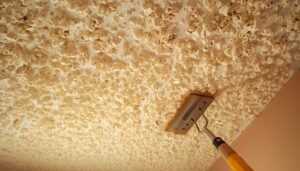
Q: How do I fix a crack in a textured wall?
A: Follow the same steps, but after sanding, you’ll need to re-create the texture. For orange peel texture, use a spray can of texture from a hardware store. For knockdown texture, apply a thin layer of compound and stipple it with a brush or sponge. Practice on a scrap board first.
Q: Why does my drywall crack keep coming back?
A: This usually means the crack is caused by movement in the house (like seasonal expansion/contraction or foundation settling). You might need to use a flexible caulk instead of compound, or install a drywall expansion joint. If it’s a recurring issue, consult a professional.
Q: How long should I wait between coats of joint compound?
A: Wait until the compound is dry and hard. This typically takes 4–6 hours at room temperature (70°F) with good ventilation. In humid conditions, it can take 12–24 hours. Don’t rush—painting over wet compound will ruin the finish.
Q: Can I paint directly over the joint compound without primer?
A: No. Joint compound is highly porous and will absorb paint unevenly, causing a dull, patchy spot. Primer seals the compound and ensures the paint adheres properly and looks uniform.
For more help, check out these guides: , , , , and .